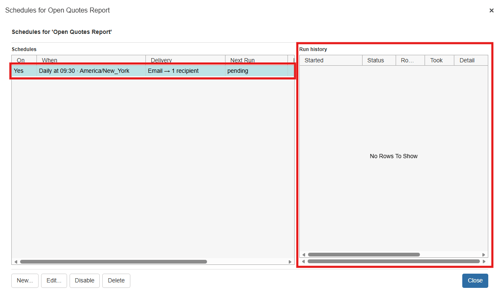
In QuoteWerks, you can schedule management reports to be automatically delivered on a recurring basis as CSV or Excel files or sent via webhook. This eliminates the need to run and distribute reports manually, saving time and ensuring reports are delivered consistently according to your schedule. You can specify the primary recipient, CC and BCC recipients, as well as configure a default subject line and message for each scheduled report.
NOTE: Product reports cannot be scheduled yet: the physical products table varies per product database, and that lookup has not been ported to the report engine.
1. To schedule a report to send on a periodic basis start by navigating to Reports on the left navigation panel.
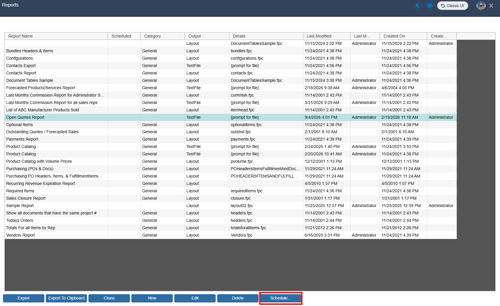
2. Select the report you would like to schedule, then click on the Schedule... button. This opens the "Schedules for [report name] window".
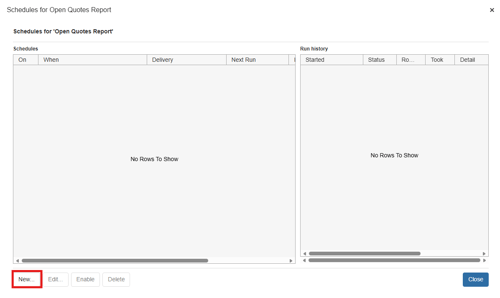
3. From the "Schedules for [report name] window" you can create the report schedule and view the run history for the report. To create a new schedule for the selected report click on the New... button at the bottom left of the window.
4. From this window you can set the parameters by which you would like the report run including enabling the schedule, when to run it, and delivery settings. You should enable the schedule by clicking on the Schedule is enabled radio button. With the schedule enabled, you can set the frequency (Daily, Weekly, Monthly) and the time you would like to run and deliver the report.
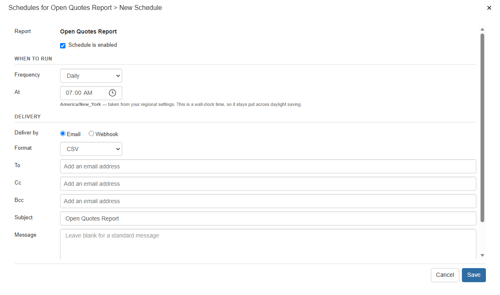
5. Additionally, you can set the delivery method to be via Email or Webhook. If setting Deliver by to Email you can select whether you would like the report delivered as an attachment in CSV or Excel (.xlsx). You can also set the default To, CC, Bcc, set a subject and a message. You can even enable to report to send if the report returns no rows by clicking the Send even when the report returns no rows radio button.
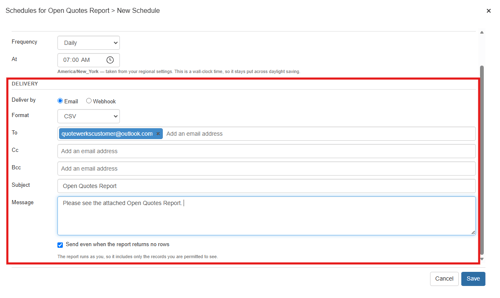
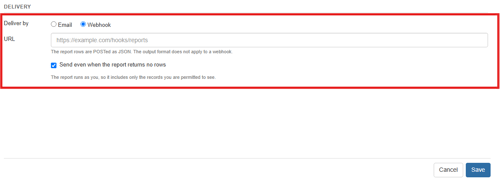
6. If you want to send the report via webhook you should click on the Webhook radio button and input your webhook URL into the URL field. You can even enable to report to send if the report returns no rows by clicking the Send even when the report returns no rows radio button.
7. To save your configured settings click on the Save button. Your scheduled report run will now be listed in the Schedules area and as the report runs you will begin to see data populating the Run History area of the window.