
QuoteWerks integrates with the top Professional Services Automation systems. The integration features vary depending on the PSA you use, but the setup is generally the same.
Topics in this article:
- Integration Setup
- CRM Specific Integration Settings
- Configuring a Product Data Source
- DataLink Setup
Integration Setup
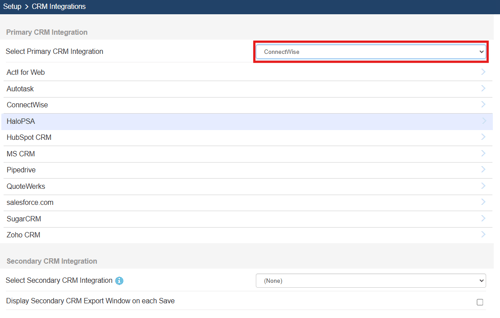
1. To begin, navigate to Setup -> CRM Integrations. Select the PSA you would like to integrate with from the Select Primary CRM Integration dropdown menu.
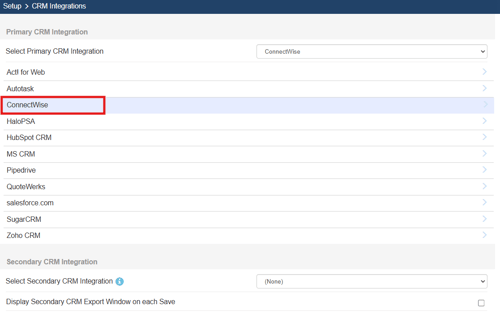
2. Click on the name of the PSA you would like to integrate with. In this case we are selecting ConnectWise.
3. Input your credentials including your ConnectWise Server URL, Company ID/Name, REST API credentials, and user credentials. You can click Test to test the connection. Click OK to save your changes.
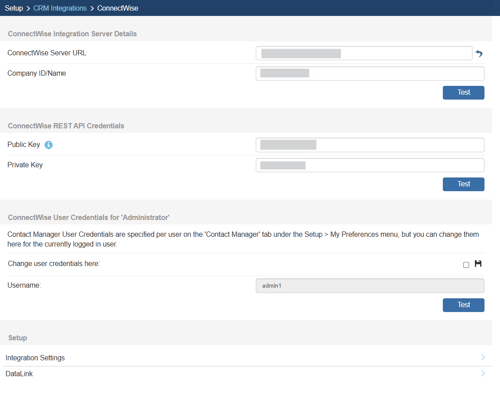
4. Click on Integration Settings to access the settings for the selected integration.

PSA Specific Integration Settings
For integration specific settings, please see the knowledge base article for each PSA:
Configuring a Product Data Source
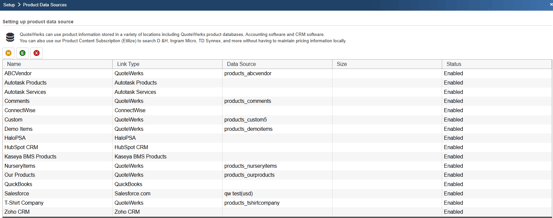
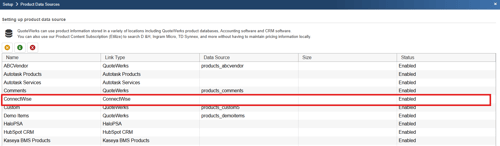
1. Many PSAs allow for you to pull products in from their product lists to be included on quotes. To set this connection up, navigate to Setup -> Product Data Sources.
2. Click on the New (![]() ) Button to create a new Product Data Source.
) Button to create a new Product Data Source.
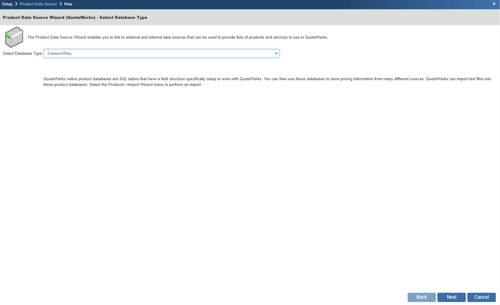
3. Select the product source you would like to use using the Select Database Type dropdown menu and click Next.
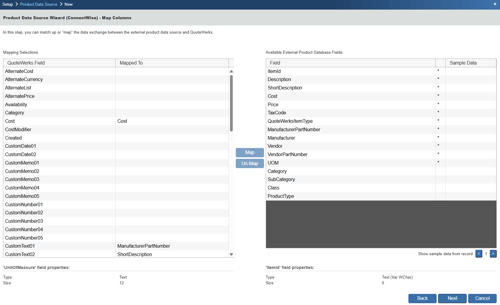
4. Map the fields from your PSA to fields in the QuoteWerks system by selecting the fields you wish to map and clicking the Map button. Once all desired fields have been mapped click the Next button.
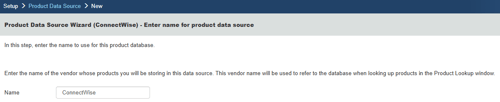
5. Give your new Product Data Source a name and click Next.
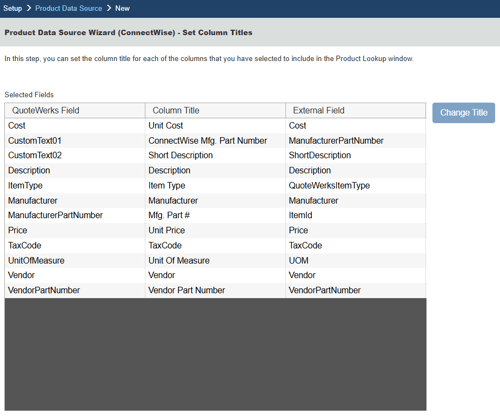
6. You can rename the column title if you wish to do so. Simply click on the row you wish to adjust and click the Change Title button. This will bring up a window where you can rename the column title. Once you have renamed your columns click Next.
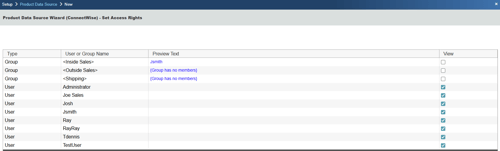
7. The next window allows you to set who has the ability to use this data source by setting up access rights. Simply check the checkbox next to the user(s) or group(s) you wish to give access and click Next.
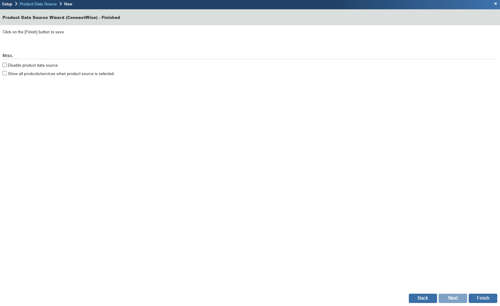
8. On the Finished page you can choose to disable the product data source and/or show all products/services when the product source is selected. Once you have made your selections click Finish. The newly created product data source will now be available in your list of configured data sources and available to select products and services from in the Product Lookup window.

DataLink Setup
DataLinks can be used to share non-standard field data across systems. This is useful if you want to push or pull specific fields to or from your PSA. In this example we show how to pull data into QuoteWerks from your PSA.
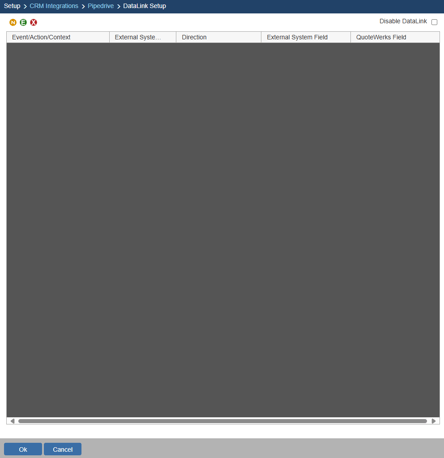
1. Navigate to the CRM Integration page and click on DataLink. The DataLink Setup window will open. If you have not created a DataLink yet, the field will be blank. If you have, it will list the DataLinks here.
2. Click on the New (![]() )button.
)button.
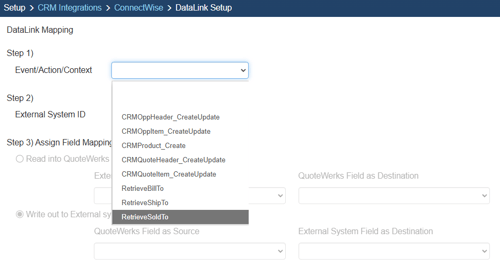
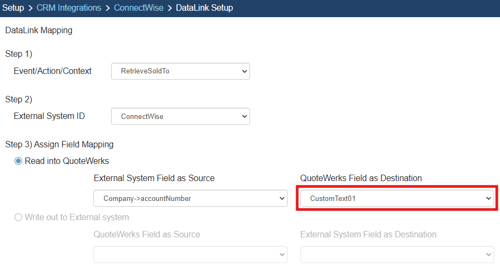
3. On the next window (DataLink Mapping), change the first drop-down menu to RetrieveSoldTo, RetrieveShipTo, or RetrieveBillTo. Your selection here will determine when the field from your CRM is pulled into QuoteWerks (i.e. the filed data is pulled in when pulling the contact details into the Sold to, Ship to, or Bill to fields).
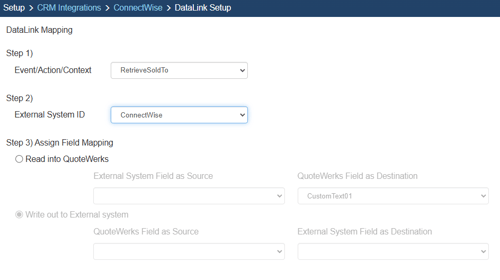
4. Under the External System ID field, change the drop down to your CRM, in this case ConnectWise.
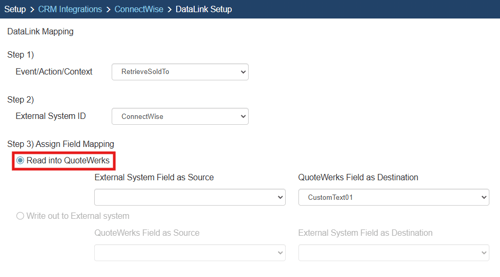
5. On the next field of Assign Field Mapping click on the radial button for Read into QuoteWerks.
6. The drop down for External System Field as Source will list the fields available from your CRM. Select the field you would like to pull into QuoteWerks.
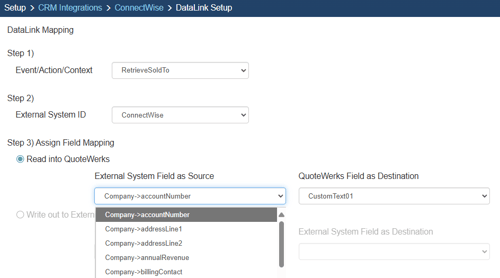
7. Once your External System Field as Source is selected, choose the QuoteWerks field that you would like the data from your CRM to populate in the QuoteWerks Field as a Destination.
8. Click [Ok] to complete the DataLink Mapping.
With the above DataLink configured the Account Number will populate CustomText01 when you retrieve the sold to contact in QuoteWerks.