
This article includes information on how to setup QuoteValet, QuoteWerks online quote delivery and acceptance vehicle.
This article includes information on the following topics:
- Entering Your Credentials
- Status Tab
- General Tab
- QuoteValet Videos
- Templates Tab
- Site Files Tab
- Payment Processing Tab
- Activity Notifications Tab
- Auto-Reminder Options Tab
- Resource Security Tab
- Email Settings Tab
Entering Your Credentials
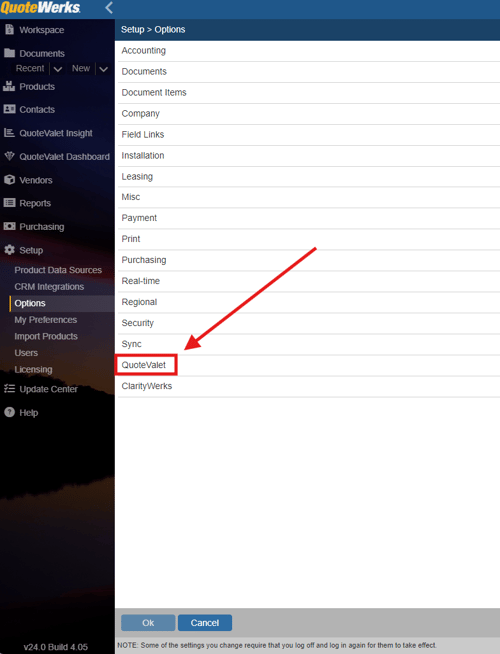
The QuoteValet setup is located in the Setup -> Options menu, under the QuoteValet page.
In order to use this feature, ensure you have added the QuoteWerks Tenant Account information to your License Manager. Once the credentials have been added, click on the [Validate Subscription] button to ensure that the installation is able to connect to the QuoteValet.com servers and check to ensure the QuoteValet Subscription (trial or paid) has been activated for your account.
NOTE: When using QuoteValet, all QuoteWerks login names need to have a password. If a QuoteWerks user’s password is blank for QuoteWerks, that user will not be able to log into quotevalet.com including using it for peer review, quote approval or sales rep facing comment posting. Each user who requires access to QuoteValet must have a password set in QuoteWerks. When accessing the www.quotevalet.com website to perform certain actions, you will be prompted to log into QuoteValet. The QuoteValet login ID and password are the same as the user’s QuoteWerks Login ID and password.
Once QuoteValet is activated, on the File -> Print window, the [Upload to QuoteValet] button will be available. Also, a QuoteValet tab will appear on the Quote Workbook and will be enabled once that particular quote has been uploaded to QuoteValet.
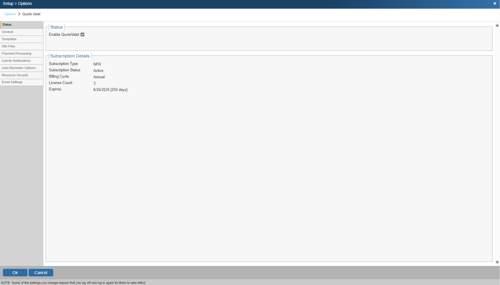
Status Tab
The QuoteValet Status tab is where you can go to enable or disable QuoteValet and review your Subscription Details as seen below. Note the tabs on the right side of the window.
General Tab
The QuoteValet General Tab is the first tab displayed in the QuoteValet Setup Window. It includes settings used for various QuoteWerks features.
TIP: To get up and running in three minutes, begin with the Quick Start.

Use For Peer Reviews
Checking this option will allow users to upload their quote to be reviewed by other sales reps in QuoteWerks via QuoteValet. If this is unchecked, users can still use the Peer Review functionality via email.
Use For Approval Requests
Checking this option will allow users to upload their quote to be approved by management via QuoteValet. If this is unchecked, users can still request Approvals via email.
Allow regular documents to be imported from QuoteValet
Documents created in Remote installations and then uploaded to QuoteValet will display in the QuoteValet Inbox of the Master installation and vice-versa. When this option is set, you can import this document into the local installation if it does not exist. This is an easy way to import a document into an installation rather than doing a DTF export/import or a sync requiring a VPN connection. This is designed only to be used to import a document into an installation to then take over actions on the document.
Prompt to Convert to Order when acceptance detected
This setting will prompt the user to convert the QuoteWerks document to an order once it has been accepted by the customer through QuoteValet. If left unchecked, the prompt will no longer automatically appear when a document has been accepted by a customer through QuoteValet.
On QuoteValet Page, Auto-Update Totals on changes
Checking this option will automatically recalculate the totals on QuoteValet quotes that have optional or quantity changeable items by refreshing the page. You may wish to leave this option off if you have quotes with a significant number of changeable line items.
QuoteValet Videos are supported for any document uploaded to QuoteValet. The videos need to be uploaded to YouTube first and can then be displayed on the QuoteValet document. Single or multiple videos can be displayed for a document as well as videos for individual line items. QuoteValet also supports default videos for every type of document (quotes, orders, invoices) created in QuoteWerks so users do not have to remember to manually include videos on documents.
YouTube Video Integration

The YouTube Video Integration enables users to pair QuoteValet with their YouTube account. This integration will allow users to select videos for their QuoteValet documents that have already been uploaded to YouTube instead of having to manually copy and paste the video URL. For setup instructions, see the QuoteValet Videos topic.
Default QuoteValet Video for New Documents
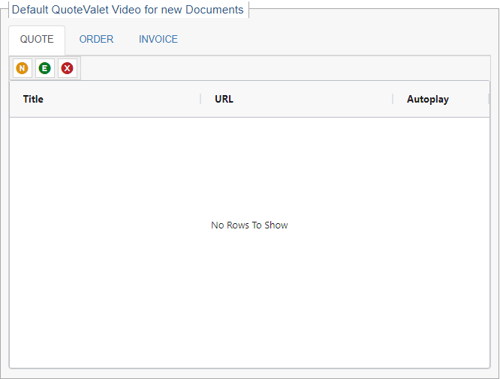
These settings enable users to set default single or multiple videos for new quotes, orders, and invoices created. This is very useful if you are looking to include videos on every document created such as information about your company, ordering instructions, etc. When these defaults are set, these videos will automatically be associated with any new quote, order, or invoice that is created in QuoteWerks. Users can remove them if needed, but will not have to remember to add them.
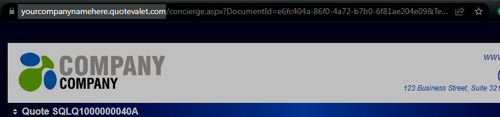
Custom QuoteValet URL

You can have a custom Alias/CNAME in the QuoteValet URL. So, instead of www.quotevalet.com, the URL could be yourcompany.quotevalet.com. This feature is helpful, so your customers that are not familiar with QuoteValet will see your company name in the URL.
Quick Start
Company Logo
Quick Start allows you to quickly upload your logo to the default QuoteValet templates to start using QuoteValet immediately without any customization.
You'll need to ensure your logo is a file type of .jpg before uploading it using the [Upload Letterhead Logo] button. After you upload your logo, it will appear on your QuoteValet documents.
NOTE: The maximum dimensions for logos should not exceed 300 pixels in height and needs to be .jpg format

After all changes have been made, click the [OK] button on the QuoteValet Setup window and close out of the QuoteValet tab.
TIP: You may need to refresh your browser cache (CTRL + F5) to see your logo replacement
Company Details
Make sure you've updated your company details in QuoteWerks (e.g., phone number, address, website), as these will automatically be uploaded to QuoteValet and used is all your QuoteValet templates.
You’re done with the basic setup of QuoteValet. You can begin using it now!
QuoteValet Videos
QuoteValet supports videos for any document uploaded to QuoteValet. The videos need to be uploaded to YouTube first and can then be displayed on the QuoteValet document. Single or multiple videos can be displayed for a document as well as videos for individual line items. QuoteValet also supports default videos for every type of document (quotes, orders, invoices) created in QuoteWerks so users do not have to remember to manually include videos on documents.
IMPORTANT: If you have customized the QuoteValet template beyond changing banners and logos, you will need to add code to the QuoteValet template to display the videos. Please contact technical support for information on how to add support for videos to your QuoteValet templates.
YouTube Video Integration

The YouTube Video Integration enables users to pair QuoteValet with their YouTube account. This integration will allow users to select videos for their QuoteValet documents that have already been uploaded to YouTube instead of having to manually copy and paste the video URL.
IMPORTANT: When QuoteValet is paired with YouTube, these credentials are used by all users. This means that everyone that has the ability to attach videos, will have access to the YouTube videos for this user. It may be a good idea to create credentials specifically for QuoteWerks and not use a personal YouTube account.
Pair Your YouTube Account with QuoteValet Videos
1. Click on the [Pair with Current YouTube session] button.
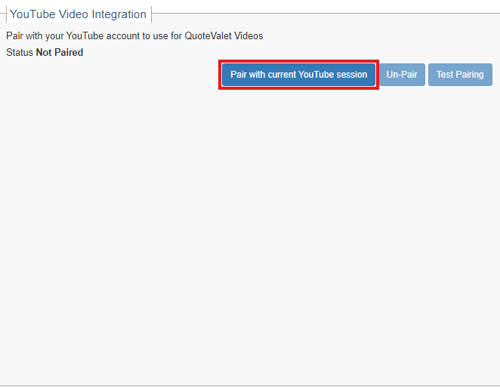
2. When prompted, select Yes when it asks if you wish to pair your current YouTube session with QuoteWerks. If you are not logged in, selecting Yes will bring you to Google's login screen. If you wish to pair another account, log out of your current YouTube account.
3. Login into your YouTube account you would like to use for QuoteValet videos then select Allow on the confirmation screen. If you are already logged in, simply select Allow.

4. After pairing, you should receive a confirmation message:

5. Your YouTube credentials should now be paired with QuoteWerks. You can now test the pairing on the setup screen in QuoteValet to ensure it is working:

Default QuoteValet Video for New Documents
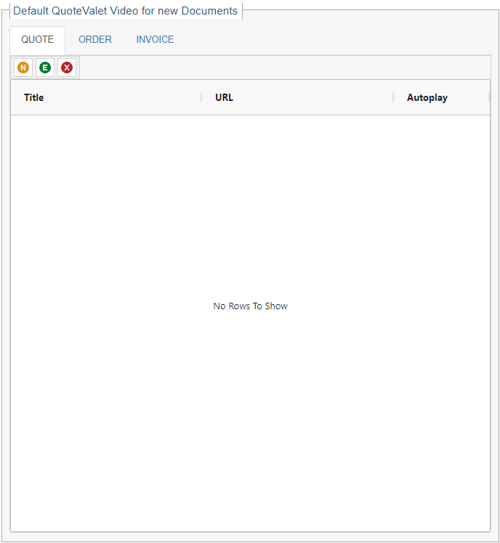
These settings enable users to set default single or multiple videos for new quotes, orders, and invoices created. This is very useful if you are looking to include videos on every document created such as information about your company, ordering instructions, etc. When these defaults are set, these videos will automatically be associated with any new quote, order, or invoice that is created in QuoteWerks. Users can remove them if needed, but will not have to remember to add them.
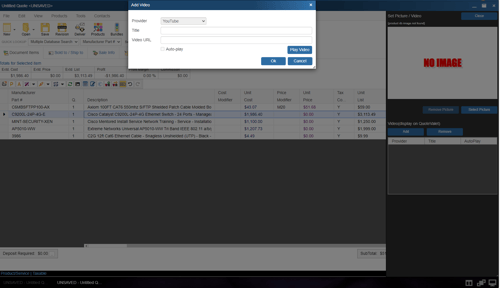
1. Click on the ![]() button
button
2. Give a title for the video. This title will appear on the QuoteValet document as the name of the video. F2 Lookup is supported in this field if you have defaults you want to setup and use.
3. Paste the YouTube URL into the Video URL field. This URL needs to be a YouTube URL in order to operate properly. F2 Lookup is also supported in this field.
4. If you would like the video to automatically start playing when the client views the document on QuoteValet, check the box for Auto-play.
5. To test the video, click on the Play Video button.
6. Click [OK] to finish the setup.

Manually Attaching QuoteValet Videos to New Documents
1. Click on the Links Tab of your QuoteWerks document.
2. Click on the [Add] button under the QuoteValet Videos section.
3. If you have Paired your YouTube account with QuoteValet and want to select a previously uploaded video, click on the drop-down menu for Select to view a list of videos available. If you don't see a recently added video, click the F5 button on your keyboard to refresh the video list.
4. If you would like to upload a new video to YouTube to use in your document, you can click on the [YouTube Video to Upload Page] button and QuoteWerks will open your YouTube account so you can upload a new video.
NOTE: If you have not paired your YouTube account with QuoteValet, you will not see the Select drop-down menu or [YouTube Video to Upload Page] button. In that case, move to Step 5 in these instructions.
5. Give a title for the video. This title will appear on the QuoteValet document as the name of the video. F2 Lookup is supported in this field if you have defaults you want to setup and use.
6. Paste the URL into the Video URL field. This URL needs to be a YouTube URL in order to operate properly. F2 Lookup is also supported in this field.
7. If you would like the video to automatically start playing when the client views the document on QuoteValet, check the box for Auto-play.
8. To test the video, click on the Play Video button.
9. Click [OK] to finish the setup.
This setup can be repeated for as many videos that need to be added to the document. Click on the Remove button to remove any videos from this document.
Line-Item Videos
In addition to document video support, users can also assign videos to specific line items in the document. Line-Item Videos can be added on the fly or set as a default for a line item via the Product Database.
NOTE: Please note that setting default videos for line items is only available for items stored in QuoteWerks Native Product Databases.
To set a default video for a specific line item in QuoteWerks, follow these instructions:
1. Click on Products-> Lookup menu option or the Products button.
2. Find the item you would like to add the video to and right-click Edit Item.
3. Click on the Video tab and click on the [Add] button.
4. If you have Paired your YouTube account with QuoteValet and want to select a previously uploaded video, click on the drop-down menu for Select to view a list of videos available. If you don't see a recently added video, click the F5 button on your keyboard to refresh the video list.
5. If you would like to upload a new video to YouTube to use in your document, you can click on the [YouTube Video to Upload Page] button and QuoteWerks will open your YouTube account so you can upload a new video.
NOTE: If you have not paired your YouTube account with QuoteValet, you will not see the Select drop-down menu or [YouTube Video to Upload Page] button. In that case, move to Step 6 in these instructions.
6. Enter in the Title for the video and copy and paste the YouTube URL for the video.
7. Click on the [Play Video] button to ensure the URL is correct.
8. Click [OK] to finish the setup.

Now, whenever this item is added to a document, the video can be viewed on the QuoteValet page.
Add Line-Item Video Manually
To add a video to a line item on an existing document in QuoteWerks, follow these instructions:
1. Highlight the item you would like to associate with a video and click on the Show/Hide Picture Panel button.
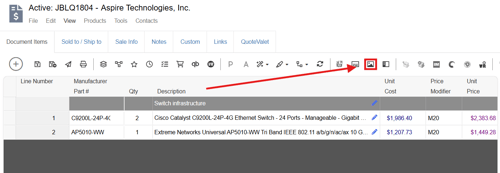
2. This button opens the Set Picture/Video window where a picture and/or video can be added to this line item.
3. Click on the [Add] button on the Set Picture/Video window and add the title and YouTube URL for the video or if paired with your YouTube account, select a video from the drop-down list or click on the [YouTube Video to Upload Page] button to open your YouTube account to upload a new video.
4. Click [Ok] to finish adding the video to the line item.
Once this document is uploaded or re-uploaded to QuoteValet, a video thumbnail will appear next to the line item. Simply click on the thumbnail to play the video.

Templates Tab
The templates tab is where all the QuoteValet templates can be viewed and customized. QuoteValet templates can be branded with your own company’s logos, colors, fields, etc.
The QuoteWerks fields from the DocumentHeaders and DocumentItems are available to be added or removed from the templates. Users can have multiple templates that show some fields and hide others.
You can also add editable fields on the QuoteValet templates such as the CustomText fields from the DocumentHeader or DocumentItems for customer input integration. This enables the customer to directly enter information into these fields or choose from lists. The customer input is then synced back into the quote in QuoteWerks.
IMPORTANT: The QuoteValet layouts are written in HTML and CSS coding and only users who have experience with advanced web design should attempt to make changes to the QuoteValet layouts.

QuoteValet comes with eight different layout types. These include the Acceptance Confirmation, Approval Request, Customer Facing, Notification Email, Notification SMS, Peer Review, Sales Rep Facing, and Quote Recall and can be found under the “Template Type”.
Template Types
Acceptance Confirmation
This is the layout the customer sees when they have accepted a quote through QuoteValet.
Approval Request
This is the layout users and managers see when a QuoteWerks document is submitted for approval via the settings under the Document Approval Settings.
Customer Facing
This layout is what the customer will see when opening a quote sent from QuoteValet.
Notification Email
This layout is the email template that the user of QuoteWerks will see when they receive an email notification from QuoteValet. This same template is used for notifications that the quote has been viewed, submitted a question or comment, an expired quote was viewed, the auto-reminders, the quote was accepted, and payment was made.
Notification SMS
This layout is for the text messages that will be sent when a large quote is accepted in QuoteValet.
Peer Review
This layout is for the Peer Reviews in QuoteValet. When a user submits a quote for Peer Review through QuoteValet their quote will be uploaded to the QuoteValet.com servers and this is the layout that the other users in QuoteWerks will see when they review the quote.
Sales Rep Facing
This is the internal view of the quote. This is what the QuoteWerks user sees when looking at the quote on QuoteValet.com. This ensures that the view is not logged as a view by the customer since it is a QuoteWerks user viewing the quote. It is also where users can comment on the quote internally without the customer ever seeing the comments.
Quote Recall
This is the layout the customer sees when a QuoteWerks user has “recalled” a quote. Recalling a quote allows you to customize a message for the user notifying them that you needed to make a change and update the quote. This is better than deleting the quote as recalling a quote will bring them to a customized page so they know you recalled the quote and not that the link is non-functional.
QuoteValet Mobile PDF Template
This is the layout the customer sees when a QuoteWerks user has created a quote in QuoteValet Mobile as a PDF.
QuoteValet Order Form
This is the layout the customer sees when a QuoteWerks user has created a shopping cart order form in QuoteWerks for the customer. The Shopping cart order form enables customer to purchase directly from the user without having to accept a quote. It also enables multiple customers to order from the same form as they will provide their own contact information when they are ready to place their order.
The template type specifies which type of template you are editing or creating. For example, if you select the “Customer Facing” template type, this means that any template you create or edit will be what the customer views when they open your quote in their web browser.
Once you have selected the template you would like to make changes to you have a few options. Using the New, Edit, or Delete buttons you can create a new template under that type, rename an existing template, or delete the template.
The ![]() checkbox for the templates tell you if the template you are currently editing is the default for the Customer Facing templates or if it is the live template that is being used for the other seven templates. To set a new template as the default for Customer Facing simply check this box when editing your template. Check the “Is Live” box to make that template live for the Acceptance Confirmation, Approval Request, Notification Email, Notification SMS, Peer Review, Quote Recall, and Sales Rep. Facing.
checkbox for the templates tell you if the template you are currently editing is the default for the Customer Facing templates or if it is the live template that is being used for the other seven templates. To set a new template as the default for Customer Facing simply check this box when editing your template. Check the “Is Live” box to make that template live for the Acceptance Confirmation, Approval Request, Notification Email, Notification SMS, Peer Review, Quote Recall, and Sales Rep. Facing.
Once you are ready to customize the template select the “Customize” radio button. This will now let you make changes in the Template HTML window.

TIP: When editing your HTML, it is recommended to select all and copy it out to a program like Notepad, Notepad++, Visual Studio, or similar to do the editing. Always be sure to save a backup copy of your customized HTML in a local txt file in case you need to revert to it.
After making changes to the template be sure to save it before clicking out of the template box. Once you have completed your changes you can preview your template before finalizing it and exiting the edit window. In order to this you will need to have already created a QuoteValet Test document.
This can be done in QuoteWerks by creating a blank document and saving it as “QuoteValet Test”. You will then need to upload that document to QuoteValet as if you were sending it to a customer.
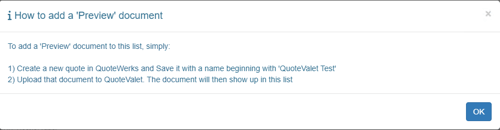
Once you have done that your document will appear in the Preview area.
![]()
Click on the Save & Preview button once you are ready to preview your changes.
Public Standardized Templates
CustomerFacing_TypedWrittenSignature
This is our standard QuoteValet template format. It includes the Template Header section, Company Information section, Document Header section, Line Item Detail section, Acceptance section, and Questions section. This Document Header section includes a link to the attached PDF file. This Template allows the customer to type their name while it produces a written-look signature.
CustomerFacing_TypedSignature
This is similar to the standard template in that it includes the Template Header section, Company Information section, Document Header section, Line Item Detail section, Acceptance section, and Questions section. This Document Header section includes a link to the attached PDF file. This Template allows the customer to type their name and then type a "signature".
CustomerFacing_DrawnSignature
This template is very similar to our standard template. The only difference is that the Acceptance section allows your customer to provide a written digital signature with their mouse. When using a tablet, your customer can sign with their tablet pen (or their finger).
CustomerFacing_InlinePDF
This template includes the Template Header section, Company Information section, an in-line PDF of the quote, Acceptance section, and Questions section.
Essentially, this template inserts your PDF file that QuoteWerks generated into the middle of the QuoteValet template, replacing the Document Header and Line Item Detail sections. Doing this has an upside and a downside. The upside is that you've already formatted the layout to generate a PDF file to look exactly how you want it, and that is what will be inserted using this template. If you don't use this inline PDF QuoteValet template, then you'll need to spend the time to try and customize the QuoteValet HTML template to match the same formatting as your QuoteWerks quote.
While the upside is that you don't have to re-create the layout format in the QuoteValet HTML template, the downside is that the quote is not interactive; your customer can't choose optional line items, etc., but they can still sign electronically.
CustomerFacing_NoDetailSection
This template includes the Template Header section, Company Information section, Document Header section, Acceptance section, and Questions section. This Document Header section includes a link to the attached PDF file.
This template is used to send the QuoteValet quote to the customer, have them view the attached PDF file, and then sign electronically. No line items are displayed, and as a result, the quote is not interactive; your customer can't choose optional line items, etc., but they can still sign electronically.
CustomerFacing_NoPDF
This template includes the Template Header section, Company Information section, Document Header section, Line Item Detail section, Acceptance section, and Questions section. This Document Header section does NOT include a link to the attached PDF file.
Legacy Templates
CustomerFacing
This is our standard QuoteValet template format. It includes the Template Header section, Company Information section, Document Header section, Line Item Detail section, Acceptance section, and Questions section. This Document Header section includes a link to the attached PDF file. This Template allows the customer to type their name while it produces a written-look signature.
CustomerFacingInlinePDF
This template includes the Template Header section, Company Information section, an in-line PDF of the quote, Acceptance section, and Questions section.
Essentially, this template inserts your PDF file that QuoteWerks generated into the middle of the QuoteValet template, replacing the Document Header and Line Item Detail sections. Doing this has an upside and a downside. The upside is that you've already formatted the layout to generate a PDF file to look exactly how you want it, and that is what will be inserted using this template. If you don't use this inline PDF QuoteValet template, then you'll need to spend the time to try and customize the QuoteValet HTML template to match the same formatting as your QuoteWerks quote.
While the upside is that you don't have to re-create the layout format in the QuoteValet HTML template, the downside is that the quote is not interactive; your customer can't choose optional line items, etc., but they can still sign electronically.
CustomerFacingNoDetailSection
This template includes the Template Header section, Company Information section, Document Header section, Acceptance section, and Questions section. This Document Header section includes a link to the attached PDF file.
This template is used to send the QuoteValet quote to the customer, have them view the attached PDF file, and then sign electronically. No line items are displayed, and as a result, the quote is not interactive; your customer can't choose optional line items, etc., but they can still sign electronically.
CustomerFacingNoPDF
This template includes the Template Header section, Company Information section, Document Header section, Line Item Detail section, Acceptance section, and Questions section. This Document Header section does NOT include a link to the attached PDF file.
CustomerFacingWrittenSignature
This template is very similar to our CustomerFacing Public Standardized template. The only difference is that the Acceptance section allows your customer to provide a written digital signature with their mouse. When using a tablet, your customer can sign with their tablet pen (or their finger).
Editing HTML/CSS in Templates
Due to the complexity of QuoteValet and the need to have advanced HTML/CSS knowledge, we do not offer direct technical support for QuoteValet modification. We do, however, have professional services, which you can contract with to get the customization services that you need.
If you have your own developers on staff, you can make modifications on your own. To access the HTML to do this, go to Setup -> Options -> QuoteValet tab, then click on the [Setup] button. This will bring you to the Templates tab, as discussed above.
The "CustomerFacing" Template Type is the most common, and the one the customer will be presented with. You can make direct changes to the HTML code there under the Templates tab.
To modify the visual look of the template, you'll need to make changes to the CSS. To do this, click on the Site Files tab, then download the "sample-customizations.css" file listed there. By default, it should save to the \QuoteWerks\QuoteValetSiteFiles folder. Click Open Containing Folder.
When you open the "sample-customizations.css" file, you'll notice it contains instructions on how to modify the CSS to perform certain changes to it, and also to educate yourself on CSS. You can make your changes to the "sample-customizations.css" file, then rename the file from "sample-customizations.css" to "customizations.css".
Then, in the Site Files tab, upload the newly renamed "customizations.css" file. This will replace the existing "customizations.css" file for your QuoteValet account. Once the file is uploaded, just refresh your QuoteValet Insight page in the browser window, and you will see the updated CSS in effect. By modifying the HTML and the CSS, you can make almost any changes you want.
Site Files Tab
NOTE: The site files tab should only be used by the user making changes to the templates.
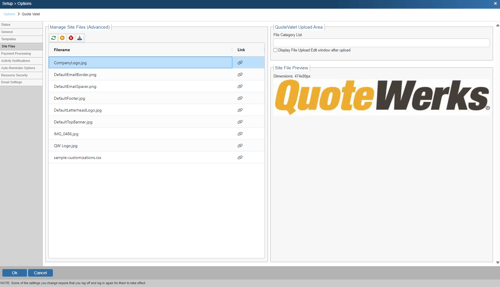
The Site Files tab includes the default logos and any other logos you would like to include on your templates, as well as any CSS files.
Only the follow file types can be uploaded to the QuoteValet Tenant Site: .GIF, .ICO, .JPG, .JPEG, .PNG, .CSS, .JS, .PDF
The maximum size for letterhead logos should not exceed 300px. PDF files cannot exceed 300K and the size for all other file types are 150K.
Here are the default sizes of the logo, top banner, and more on QuoteValet:

There are four buttons on the Site Files menu. The buttons perform the following functions:
![]() : Refreshes the file list with the most up to date versions of the files listed
: Refreshes the file list with the most up to date versions of the files listed
![]() : Uploads a new file to the QuoteValet server (drag and drop is also supported)
: Uploads a new file to the QuoteValet server (drag and drop is also supported)
![]() : Deletes existing files from the QuoteValet server (highlighting a file and using the Delete key will also delete the file)
: Deletes existing files from the QuoteValet server (highlighting a file and using the Delete key will also delete the file)
![]() : Downloads the highlighted file into your \QuoteWerks\QuoteValetSiteFiles folder
: Downloads the highlighted file into your \QuoteWerks\QuoteValetSiteFiles folder
You can highlight multiple site files at once to upload, download, or delete.
QuoteValet Upload Area
File Category List
QuoteValet Upload Area is where you manage your file categories for documents that are uploaded to QuoteValet. This allows you to more easily organize the documents that your clients provide. The categories can be set by typing in the category name and separating them with a comma.

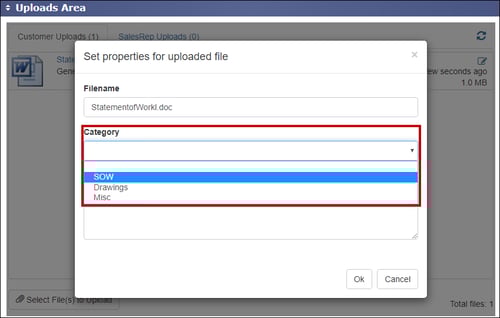
Display File Upload Edit Window After Upload
This checkbox will automatically open the Set Properties for Uploaded File window for your clients and sales reps. This means anytime a file is uploaded this window will appear. This window allows users to change the file name, set the category (if applicable), and include any notes that are important to this specific file.
Payment Processing Tab
QuoteValet accepts payments (deposits, partial payments, final payments, etc.) through over 80 payment gateways, including Authorize.net, QuickBooks merchant services, and PayPal. Additionally, for QuickBooks users, payments received by QuoteValet can be imported as a customer payment in QuickBooks and automatically applied to the customer that made the payment.
NOTE: If using the QuoteValet payment features, you must preserve the quote when converting to an order. This option is set under the Tools-> Options-> Installation tab. Additionally, you need to make sure you have set a default deposit amount and at least one payment option. If these are not set, your customer won't be able to make payment even after you've setup your payment gateway.

Payment Gateway Accounts
There are four buttons on the Payment Gateway Accounts menu. The buttons perform the following functions:
![]() : Refreshes the Payment Gateway Accounts list with all the gateways that have been created
: Refreshes the Payment Gateway Accounts list with all the gateways that have been created![]() : Creates a new payment gateway for QuoteValet. This is where you will choose which gateway you would like to use. You may choose multiple gateways.
: Creates a new payment gateway for QuoteValet. This is where you will choose which gateway you would like to use. You may choose multiple gateways. ![]() : Deletes existing gateways from the QuoteValet server:
: Deletes existing gateways from the QuoteValet server: ![]() : Edits existing gateway information from QuoteValet, such as new ids, passwords, etc.
: Edits existing gateway information from QuoteValet, such as new ids, passwords, etc.
Creating New Payment Gateway
To create a new payment gateway click on the ![]() button. Once clicked, the “QuoteValet Payment Gateway Accounts” window will open. There will be a drop-down so you can select the payment gateway you would like to setup. The four types of payment gateways available include Credit Card, EChecks (ACH), and PayPal.
button. Once clicked, the “QuoteValet Payment Gateway Accounts” window will open. There will be a drop-down so you can select the payment gateway you would like to setup. The four types of payment gateways available include Credit Card, EChecks (ACH), and PayPal.
You can also click on the credit card icon and PayPal icon to choose one of those payment options.
Merchant Account – Credit Card
The credit card option will provide you with a drop-down box with the supported credit card vendors in QuoteValet. Once you have selected the vendor you wish to use you will need to fill in the appropriate fields such as the Gateway, Login, Passwords, etc. You can also specify which credit card types you accept (VISA, Master Card, American Express and/or Discover).
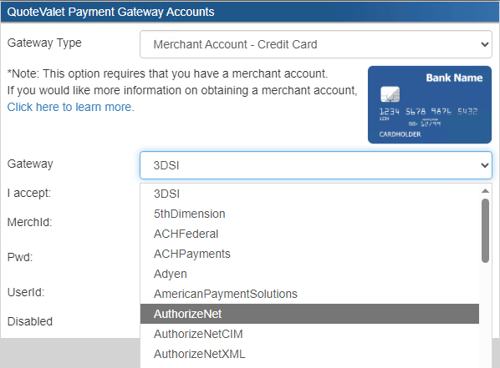
TIP: Click here for instructions on how to setup individual payment gateways.
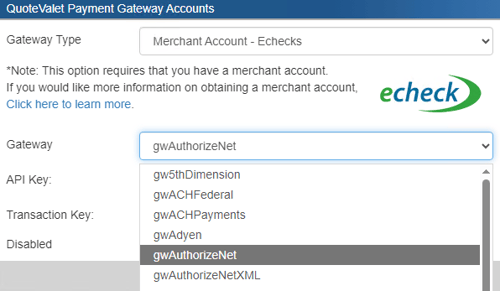
Merchant Account - ECheck
The ECheck option will provide you with a drop-down box with the supported ECheck vendors in QuoteValet. Once you have selected the vendor you wish to use you will need to fill in the appropriate fields such as the Gateway, Login, Passwords, etc. You may need to contact your merchant to add ACH support if you have not activated it on your account.
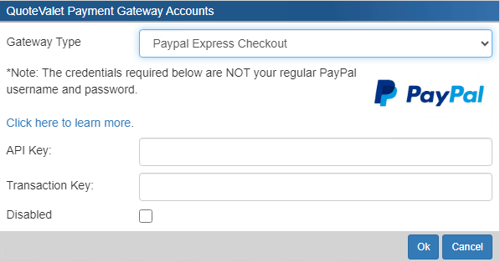
PayPal Express Checkout
The PayPal Express Checkout option will allow you to use your PayPal account to accept payments. You will need to fill in the API Username, API Password, and API Signature.
NOTE: The credentials required are NOT your regular PayPal Username and Password. They are the credentials for the API. Instructions for obtaining the API credentials can be found by following the steps below:
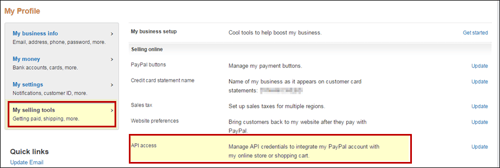
1. Login to your PayPal account
2. Click the Gear at the top -> Profile and Settings.

3. Click on My Selling Tools -> API Access ('Update' Link on right)
4. Under NVP/SOAP API Integration, select "Request API credentials".

5. Select "Request API Signature" option and click on the [Agree and Submit] button.

6. Click on the "Show Link" option under each credential to view them and copy and paste these into the Payment Gateway form.
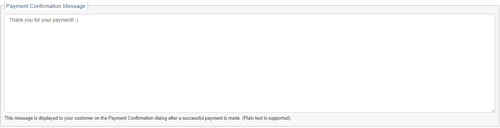
Payment Confirmation Message
The Payment Confirmation Message is the message that will be displayed after a successful payment is made. Type into this message to set your default and then click [Save].
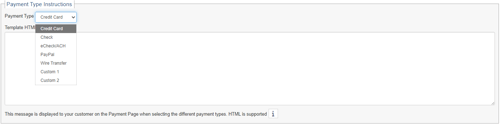
Payment Type Instructions
The Payment Type Instructions are displayed on the payment page. These instructions enable users to set a specific message when selecting a payment option. For example, if you wanted to give the customer the option to pay by check, you could create a specific set of instructions that display when the customer selects the payment option of "Check". This could include who to mark the attention to on the envelope as well as confirm the proper address to send the check too. For wire transfer, you could include your wire transfer account information.
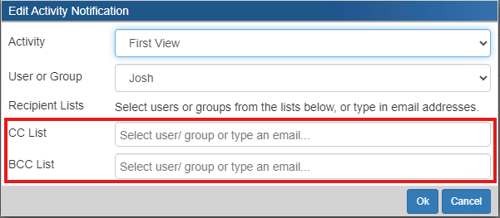
Activity Notifications Tab
The Activity Notifications Tab enables users to specify who receives the QuoteValet Notifications for key QuoteValet events. Events include when a quote has been accepted, when payment has been made, when a QuoteValet Mobile quote has been created, when a OrderForm order has been placed, the document first view notification, when a document is approved/not approved, and when a Peer Review comment has been posted. Users can add additional users/email addresses to receive a CC or BCC of the notification. This is especially useful for keeping the accounting department in the loop when payments are received and for keeping sales managers in the loop when quotes are accepted.
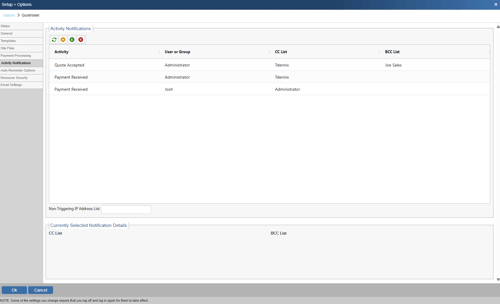
Non-Triggering IP Address List
This fields is used to define IPs or IP ranges that should not trigger the First View activity notification. This is useful to prevent view notifications from being triggered by your own internal email scanning systems that follow all links in an email and erroneously trigger customer view notifications. Multiple IPs can be added so long as they are separated by a comma. Additionally, you can add a range of IPs for an entire group of IPs by leaving the octet you wish to exclude blank. For example, if you wanted to exclude all IPs in the final octet of an IP range you could simply put 192.168.1. To further exclude IPs from an additional octect you could put 192.168.
To set up the notifications for other users first choose your activity. You can choose from Quote Acceptance, Payment Received, Mobile Quote Created, OrderForm Order Placed, First View, Approval Approved, Approval Not Approved, and Peer Review Posted, Customer Intends to Pay, Payment Failed, Comment Posted by Customer, Comment Posted by Sales Rep, Expired Quote.
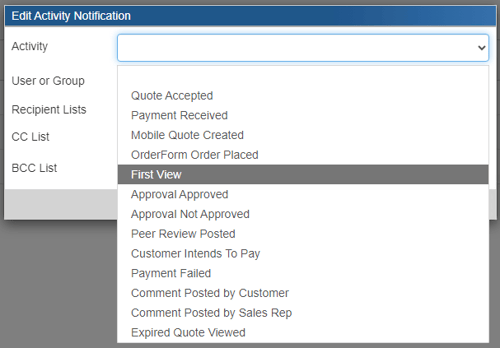
Next, select the rep or group who will be creating the documents. For example, if you want notifications to be sent out to other email addresses for Inside Sales Reps quotes, then you would select the Inside Sales group here. If you want the Administrators notifications to be sent to another email address, then you would select the administrator here.

The final step includes choosing where you would like the notifications to go. There are two options a CC list and a BCC list. For both you can select a group or single user in QuoteWerks from the drop-down box.
Auto-Reminder Options Tab
Reminder Options Defaults
The Auto-Reminder Options tab is where users can set the default Auto-reminder settings for the installation. The Auto-reminders are automatically generated emails sent to the client and the SalesRep to remind them to view the document, let them know it is expiring, and also that an accepted quote still has a balance. The selections made will apply to all users who utilize QuoteValet. Users have the option to manually adjust the reminder settings on each document uploaded to QuoteValet. If no selections are changed, then the default selections will be used.

Recipient Reminders
Remind Recipient if document NOT VIEWED within X days: Selecting this checkbox will send an email to the recipient (customer) the selected number of days AFTER the quote has been delivered, reminding them that they have not yet viewed the quote. If they have already viewed the quote, this reminder WILL NOT send.
Remind Recipient when document is EXPIRING in X days: Selecting this checkbox will send an email to the recipient reminding them that their quote will be expiring in a specified number of days. If the QuoteValet document has been accepted, recalled, or converted to Lost, this reminder WILL NOT send.
Remind Recipient when document is accepted, but NOT PAID after X days: Selecting this checkbox will send an email to the recipient reminding them there is a balance that needs to be paid on the accepted quote. This reminder will only send if the document has been accepted AND a deposit has been set for the document.
SalesRep Reminders
Remind SalesRep if document NOT VIEWED within X days: Selecting this checkbox will send an email to the SalesRep (user) the selected number of days AFTER the quote has been delivered, reminding them that the quote has not been viewed by the customer yet. If the customer has already viewed the quote, this reminder WILL NOT send.
Remind SalesRep when document is EXPIRING in X days: Selecting this checkbox will send an email to the SalesRep reminding them that their quote will be expiring in a specified number of days.
Remind SalesRep when document is accepted, but NOT PAID after X days: Selecting this checkbox will send an email to the SalesRep reminding them there is a balance that needs to be paid on the accepted quote.
The reminder emails sent to the SalesRep and the customer are available to be modified in the Templates Tab. Select the Notification E-mail template drop down and you can make edits to the text and look of the notification emails.
Resource Security Tab
The Resource Security Tab in QuoteValet enables users to set security settings for QuoteValet Insight and QuoteValet Insight Leaderboard. This feature enables companies to select who has access to QuoteValet Insight and QuoteValet Insight Leaderboard. It can be specified per user by IP address. This enables users to make sure only users on the approved IP address list would be able to access QuoteValet Insight and the QuoteValet Insight Leaderboard. It also controls where the information can be accessed to keep users from pulling this information if they are out of the office or on an unsecured Wifi network.

To set up the security settings for a new user or group click on the ![]() icon. This will bring up a new window where you can select user(s) or groups to add to the approved list:
icon. This will bring up a new window where you can select user(s) or groups to add to the approved list:

Once you have made your selections click on the ![]() icon on the IP address list to add your approved IP address. You also have the option to deny a certain group to lock users or groups out of using the QuoteValet Insight or Leaderboard.
icon on the IP address list to add your approved IP address. You also have the option to deny a certain group to lock users or groups out of using the QuoteValet Insight or Leaderboard.
If you need to edit any of the users or groups on the approved or deny list, clicking on the ![]() button will enable you to make those changes. Finally, if you need to delete an enabled setting, click on the
button will enable you to make those changes. Finally, if you need to delete an enabled setting, click on the ![]() button to remove it.
button to remove it.
Email Settings Tab

General
Use the Sales Rep's email address when sending automated emails from QuoteValet to the customer
This option uses the Sales Rep email address as configured in Setup -> My Preferences.
Note: Your email-related DNS records (SPF, DKIM, and DMARC) must be configured properly to ensure delivery.
Note: You will likely need to configure the QuoteValet DKIM Relay settings to ensure delivery.
Note: If this option is not checked then emails are sent from DoNotReply@quotevalet.com
Use the customer's email address when sending automated emails from QuoteValet to the Sales Rep
This option uses the customer's email address as set in the sold to email field in the quote.
Note: This option is NOT recommended and only made available for LEGACY purposes.
Note: You will need to whitelist ALL inbound email from the QuoteValet server in order to ensure delivery.
Note: If this option is not checked then emails are sent from DoNotReply@quotevalet.com
Specify an override FROM address to use when sending automated emails from QuoteValet to the Sales Rep
This option will use the provided email address as the from address when automated emails are sent to the Sales Rep.
Note: This setting overrides / trumps the LEGACY option above.
Note: Your email-related DNS records (SPF, DKIM, and DMARC) must be configured properly to ensure delivery.
Note: You will likely need to configure the QuoteValet DKIM Relay settings below to ensure delivery.
QuoteValet DKIM Relay
IMPORTANT: Using DKIM Relay requires you be on Version 24 Build 4.01 or higher.
QuoteValet DKIM Relay settings allow you to control how emails sent from QuoteValet are authenticated. By default this is set to not use DKIM relay, however it is generally recommended to use if you have the option. In order to use this feature and ensure email delivery, your email-related DNS records must be configured to allow QuoteValet to send email on your domain's behalf.

IMPORTANT: Setting up DKIM relay requires you to make changes to your Email server. It is best practice to have someone familiar with your email server do the set up and to follow the provided instructions closely.

Do NOT use DKIM relay
This is the default setting. With no DKIM relay configured QuoteValet emails will come from DoNotReply@quotevalet.com
NOTE: Technical support can provide limited, basic assistance to users who choose to use the Simple DKIM relay. However, please note that setting up the Simple DKIM relay may involve making minor adjustments to your email server's DNS settings.
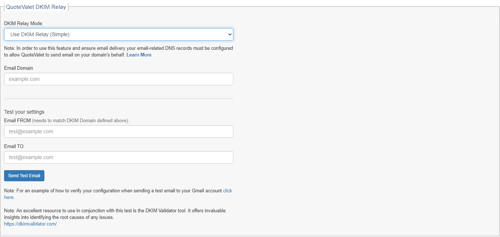
Use DKIM relay (Simple)
This is the recommended setting. Setting up DKIM relay (Simple) will allow you to send emails from the email configured in Tools > My Preferences. In order to use this feature and ensure email delivery your email-related DNS records must be configured to allow QuoteValet to send email on your domain's behalf. In addition to inputting the information requested on the screen above, it requires you take specific steps on your email server as outlined below.
DNS Record Configuration
NOTE: Improperly configuring your DNS records can cause downtime for your company's internet resources such as websites and email. If you are unsure, please consult your DNS administrator to make these changes.
SPF
Your SPF record must contain the following: include:azure.quotevalet.com.
Depending on your current DNS configuration you may be updating an existng record or creating a new one.
Update Record Example:
Current SPF record: v=spf1 include:_spf.google.com ~all
Updated SPF record: v=spf1 include:_spf.google.com include:azure.quotevalet.com ~all
New Record Example:
New SPF record: v=spf1 include:azure.quotevalet.com -all
CNAME Record
In your DNS settings, create a CNAME record named 'qwtenant._domainkey'
For the record's value enter qwtenant._domainkey.quotewerks.com.
DMARC
Generally there are no changes necessary for your DMARC record. In practice we've found that
if the SPF and CNAME records are configured properly QuoteValet is able to send email on behalf
of customers even when their DMARC record is configured for Strict alignment.

IMPORTANT: Technical support is not able to provide in-depth assistance for users who choose to use the Advanced DKIM relay. This is because configuring the Advanced DKIM relay often involves complex adjustments to your email server's DNS settings, which require a high level of technical expertise and a deep understanding of how your email servers are currently configured
Use DKIM relay (Advanced)
This option should only be used by advanced users. It requires very specific settings be configured on your email server. Like setting up DKIM relay (Simple), DKIM Relay (Advanced) will allow you to send emails from the email configured in Tools > My Preferences. In order to use this feature and ensure email delivery your email-related DNS records must be configured to allow QuoteValet to send email on your domain's behalf. In addition to inputting the information requested on the screen above, it requires you take specific steps on your email server as outlined below.
DNS Record Configuration
NOTE: Improperly configuring your DNS records can cause downtime for your company's internet resources such as websites and email. If you are unsure, please consult your DNS administrator to make these changes.
SPF
Your SPF record must contain the following: include:azure.quotevalet.com.
Depending on your current DNS configuration you may be updating an existng record or creating a new one.
Update Record Example:
Current SPF record: v=spf1 include:_spf.google.com ~all
Updated SPF record: v=spf1 include:_spf.google.com include:azure.quotevalet.com ~all
New Record Example:
New SPF record: v=spf1 include:azure.quotevalet.com -all
DKIM
Generate a public-private key pair using the following DKIM Record Generator Tool (2048 Key Length recommended):
https://easydmarc.com/tools/dkim-record-generator
In your DNS settings, create a TXT record named 'SELECTOR._domainkey'
(where SELECTOR is the selector name you provided to the DKIM Record Generator Tool).
For the TXT record's value enter the record value provided by the tool.
TXT Record Value Example:
v=DKIM1; t=s; p=PUBLIC_KEY_STRING
DMARC
Generally there are no changes necessary for your DMARC record. In practice we've found that
if the SPF and DKIM records are configured properly QuoteValet is able to send email on behalf
of customers even when their DMARC record is configured for Strict alignment.
QuoteValet DKIM Relay
- DKIM Domain: The domain name provided when using the DKIM Record Generator Tool above.
- DKIM Selector: The selector provided when using the DKIM Record Generator Tool above.
- DKIM Private Key: The private key generated when using the DKIM Record Generator Tool above.
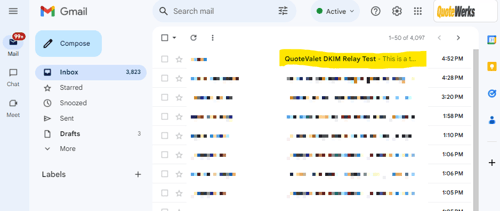
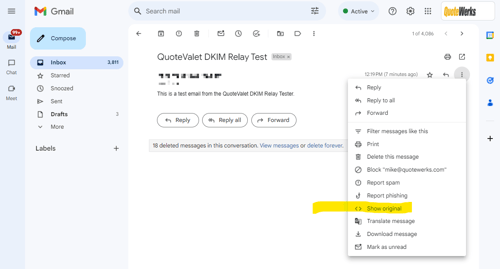
Verifying Your Configuration
1. Find and open the test email that was sent to your Gmail email address.

NOTE: An excellent resource to use in conjunction with this test is the DKIM Validator tool. It offers invaluable insights into identifying the root causes of any issues.
https://dkimvalidator.com/