
This article will take you through the steps of integrating your ACT! for Web CRM with QuoteWerks Web.
This article covers the following areas of the Act! for Web integration setup:
General Setup
IMPORTANT: For simplicity, we refer to the QuoteWerks integration with the web version of ACT! as "ACT! for Web" regardless of whether you are hosted on-prem or with Act! Cloud.
Step 1: Launch QuoteWerks.
Step 2: Click Contacts -> Setup Contact Manager from the main toolbar.
Step 3: Select Act! for Web as your contact manager on the left side of the Contact Manager Setup window.
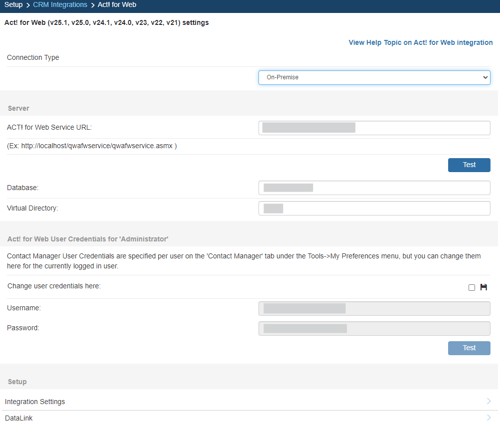
Step 4: Connection Type
Here you select your Act! For Web account type.
Step 5: Server
Act! for Web On Premise Setup
In the Act! for Web Service URL, enter the web address that you use to access your Act! for Web installation through a browser.
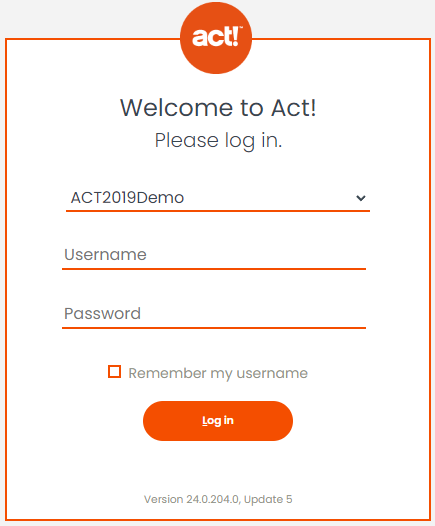
Enter your Act! Database Name. This is the name displayed when you first log into your Act! for Web through a browser.
You can also find this in Act! Desktop under Help --> About Act! --> Database Information
The Virtual Directory will pre-populate with the most common location for this directory. You may need to check with your Act! for Web webserver administrator if they customized this location.
Act! for Web Cloud Setup
In the Act! for Web Service URL, enter the web address that is the appropriate regional API URL associated to your account. The API endpoint address depends on how you access your Act! in the Cloud database.
If you access it by going directly to its own URL (which will look similar to this: https://usp1-iis-99.hosted1.act.com/YourSiteName/), then the API endpoint takes the format of your Cloud URL suffixed with "-api/act.web.api".
For Example:
- Cloud Login URL: https://usp1-iis-99.hosted1.act.com/YourSiteName/
- API Endpoint: https://usp1-iis-99.hosted1.act.com/YourSiteName-api/act.web.api
However, if you access your Act in the Cloud database by using https://my.act.com then you will need to use the regional API URL associated to your account. These are as follows:
- US - https://apius.act.com/act.web.api
- UK - https://apiuk.act.com/act.web.api
- AUS/NZ - https://apiau.act.com/act.web.api
- EU/International English - https://apieu.act.com/act.web.api
Enter your database name. This can be found on the Help --> About Act! window.
TIP: If you enter your user credentials, you can hit the Lightning Bolt to return your database name automatically.
Step 6: Act! for Web User Credentials
QuoteWerks also needs your Act! Username and Password to log into and integrate with Act!. Enter these credentials, click the Test button to verify them, then click the ![]() icon to save them.
icon to save them.
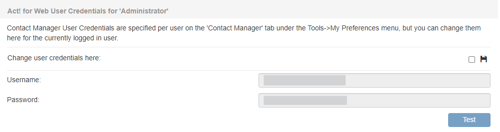 Since these are user-based credentials, you will also need to enter these on the Contact Manager tab under Setup > My Preferences, for each user setup in QuoteWerks as shown in the screen shot below.
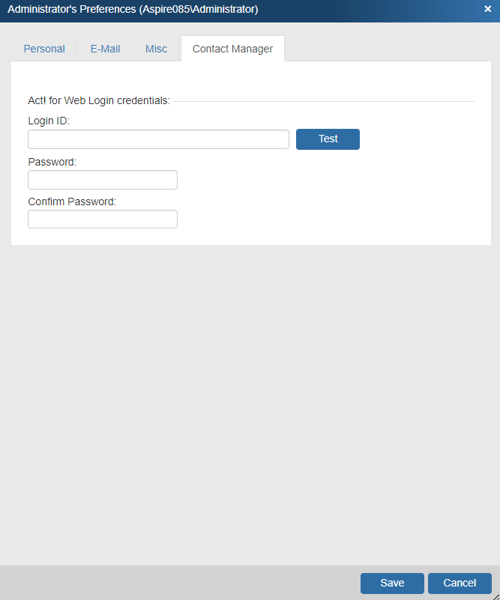
Use the Test button to verify your credentials are entered correctly.
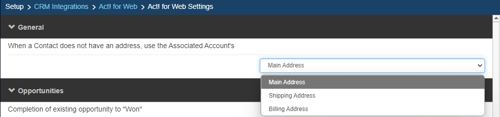
General Tab
Here you can specify which address to use when a Contact does not have their own address. These addresses are populated from Act! for Web.
Opportunities Tab
Completion of Sales Opportunity from QuoteWerks

QuoteWerks provides you with the flexibility to control when a sales opportunity created by QuoteWerks in ACT! for Web will be converted to a completed sale. The ACT! for Web sales opportunity can be completed by QuoteWerks when converting to an order (File -> Convert to Order menu), an invoice (File -> Convert to Invoice menu), or Never. Never means QuoteWerks will never attempt to complete the Opportunity, the Opportunity will need to be manually updated within ACT! for Web. This provides a greater level of control for sales managers or administrators who would prefer to manually close the opportunities from within ACT! for Web rather than have QuoteWerks automatically close them.
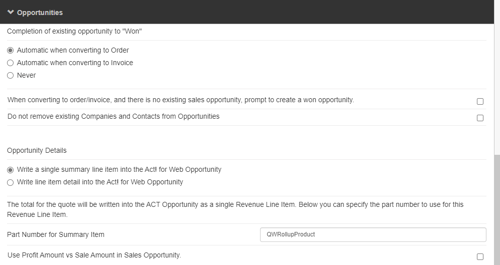
Opportunity Details
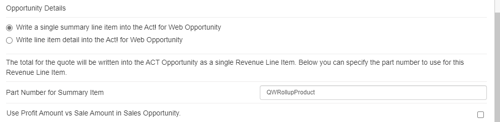
Write a single summary line item into the ACT! Opportunity
If you select this option, QuoteWerks will write a single summary line item with just the totals into the ACT! for Web Opportunity.
ACT! for Web Opportunities require part numbers for all line items. As such, if you choose this option, you will need to specify a part number in the “Part Number for Summary Item” field. This is the part number that will be assigned to the summary item in the Products and Services tab of the ACT! for Web Opportunity window.
Use Profit Amount vs Sale Amount in Sales Opportunity
When QuoteWerks creates a sales opportunity in ACT! for Web, this option will use the profit amount of the quote instead of the sale amount when creating the sales opportunity.
Write line item detail into the ACT! Opportunity
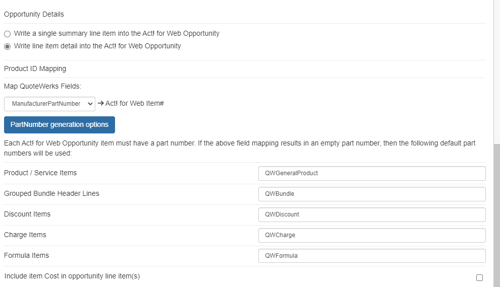
If you select this option, QuoteWerks will write the details for each individual line item into the ACT! for Web Opportunity.
QuoteWerks will use the manufacturer part number field for the line item in QuoteWerks as the ACT! for Web part number. If a line item in QuoteWerks does not have a manufacturer part number, such as Grouped Bundle Header Lines, you will need to specify the part number to use.
Include item Cost in opportunity line item(s)
If you select this option, QuoteWerks will include both the Cost and Price in the opportunity line items.
Product ID Mapping
You can choose which field in QuoteWerks to map to the corresponding field (ItemName, PartNumber, etc.) in your CRM. You can select the ManufacturerPartNumber, InternalPartNumber, ItemType, and more.
Typically, the manufacturer part number will be used, unless you're creating your own custom part numbers in your CRM.
In the simplest scenario, you can set up the link to just use a QuoteWerks part number (like the Manufacturer field) as the CRM Opportunity CRMProductID. As a starting point, the value from a specified field (like the QuoteWerks "ManufacturerPartNumber" field) is used.
The auto-generation feature will allow for more than this when the InternalPartNumber or any CustomTextxx field is selected as the mapped field. This auto-generation feature will allow for many scenarios of use, including the ability to maintain your own proprietary part numbers in the Opportunity.
NOTE: If your CRM integration supports using CRM Products as a product data source link, you can even use the Etilize functionality in combination with your own proprietary parts in the CRM Opportunity.
To use the auto-generation feature, select an option other than ManufacturerPartNumber from the Map QuoteWerks Field drop-down box, then click the [PartNumber generation options] button.
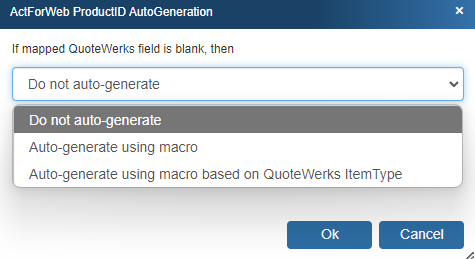
As shown above, there are three auto-generation options:
Do not auto-generate
When exporting items to CRM Opportunity, if the mapped field is empty, this option will stop and force you to specify your proprietary part number. If you pulled the part from the CRM Opportunity, it will already have your proprietary part number from the CRM Opportunity. This is useful when you have custom part numbers that aren't based on any field or combination of fields. When exporting items to the CRM Opportunity, if the mapped field is empty, you'll be forced to manually specify a CRMProductID before proceeding. This is used when using your own proprietary part numbers.
Auto-generate using macro:
With this option, when exporting items to the CRM Opportunity, instead of just using a simple field value like the ManufacturerPartNumber to become the CRM Opportunity CRMProductID, you can choose to have the CRM Opportunity CRMProductID auto-generated using a macro such as &DI_ItemType:&DI_ManufacturerPartNumber.
Auto-generate using macro based on QuoteWerks ItemType:
With this option, when exporting items to the CRM Opportunity, instead of just using a simple field value like the ManufacturerPartNumber to become the CRM Opportunity CRMProductID, you can choose to have the CRM Opportunity CRMProductID auto-generated based on the item's ItemType.
So, for example, if the ItemType is "Haas," you can map to an auto-generation macro of "Haas:&DI_ManufacturerPartNumber," but if the ItemType is "Hardware", you can map to an auto-generation macro of just "&DI_ManufacturerPartNumber." You can also set a value for If any ItemTypes are not mapped use the following macro.
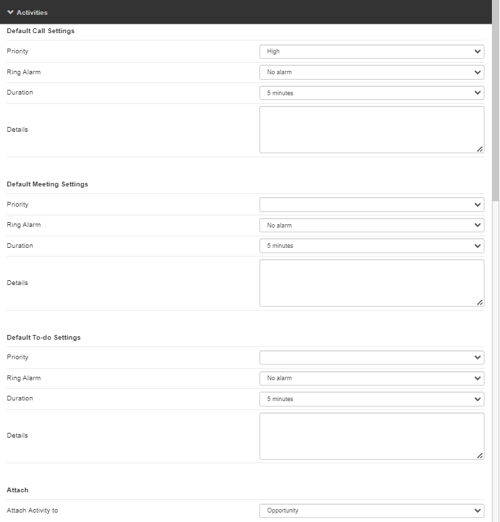
Activities Tab
Here you can set the default settings for Activities (calls, meetings, to-dos) created by QuoteWerks in Act! for Web including the priority, Alarm, Duration, Details, and whether the activities are attached to the Opportunity or the Contact.
Attachments Tab
Here you can set whether the attachments such as Document Transport Files and PDFs are attached to the Contact or the Opportunity in Act! for Web.

See also: