
This article takes you through using ACT! for Web with QuoteWerks. This will allow you to pull ACT! for Web customer records into sales quotes, create ACT! for Web opportunities, and much more using a single application: QuoteWerks.
This article includes information on the following topics:
- QuoteWerks searches for your ACT! for Web Contacts
- Automatically create and update Sales Opportunities
- Create Document Attachments
- Create ACT! for Web Follow-up Calls
- Create ACT! for Web Meetings
- Create ACT! for Web To-Dos
- Create new ACT! for Web Accounts and Contacts
- Completing or Updating a Completed Sale in ACT! for Web
- DataLink Setup
- F2 Lookup Features
QuoteWerks searches for your ACT! for Web Contacts
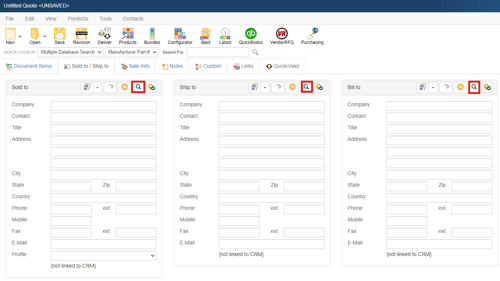
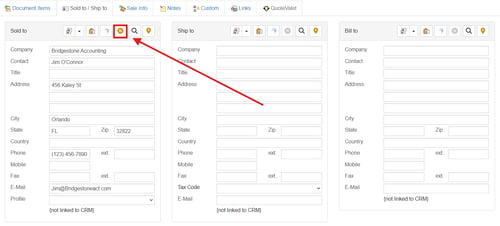
Select the Sold to / Ship to Tab in QuoteWerks in the document workbook and click on the ![]() button next to the Sold to, Ship to, or Bill to fields.
button next to the Sold to, Ship to, or Bill to fields.
The Lookup ACT! for Web contact window will appear:
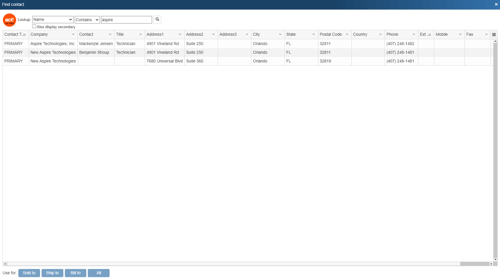
You can search for an ACT! for Web Company or Contact to use in the quote, and you can also search by Last Name or Phone Number.
Once you have found the record you are looking for, select the contact (or company) and click on the [Sold To] button to use this contact for the Sold to information. You can also select a contact and click on the [Ship To] button to use this contact for the Ship to information or you can click on the [Bill To] button to use this contact for the Bill to information. When you are finished selecting contacts, click on the [Close] button. You will be returned to the Sold to/Ship to tab and the selected contacts will be pre-filled in the Sold to/Ship to/Bill to fields.
Automatically create and update Sales Opportunities
To initiate the creation of a sales opportunity in Act! for Web click on the Save icon on the standard tool bar. This opens the Save Quote window.
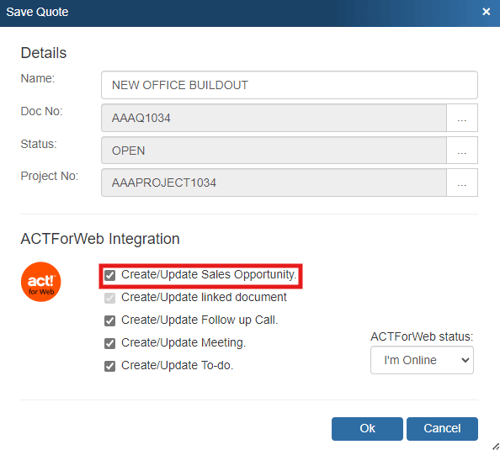
If you select the Create/Update Sales Opportunity option, the Create ACT! for Web Sales Opportunity window will appear so you can review and make changes to the sales opportunity before it is created in ACT! for Web. These details include the Stage, Probability, Est. Close Date, and details.
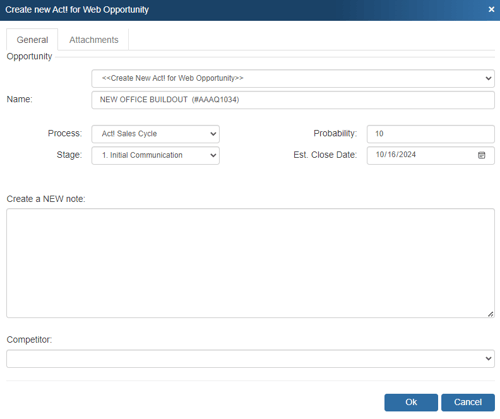
If you've already previously created a sales opportunity for this quote, QuoteWerks will display it so you can review/modify it.
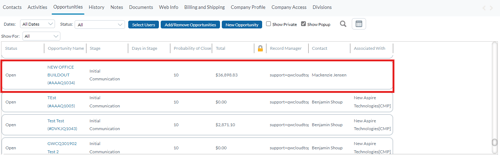
When you are in ACT! for Web, you can find the Sales Opportunity by either choosing the Opportunities option under the Lookup menu or you can open the associated contact and click on the specific Opportunity on the Opportunities tab.
The Sales Opportunity will automatically be completed in ACT! for Web when the Quote is converted to an Order (File -> Convert to Order menu) or an Invoice (File -> Convert to Invoice menu).
Create Document Attachments
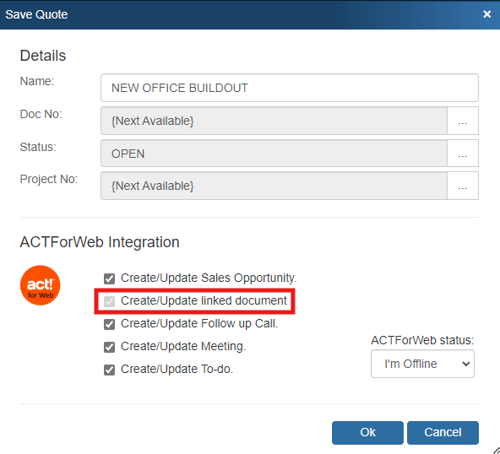
When saving a new quote and ACT! for Web is running, a Create/Update linked document under Documents tab checkbox will appear on the Save Quote As window. This option will create a document record under the ACT! for Web Documents tab, allowing you to easily track all the quotes you have done for each contact from the ACT! for Web contact record. Since ACT! for Web is a web-based solution the document will be copied up to the web server.
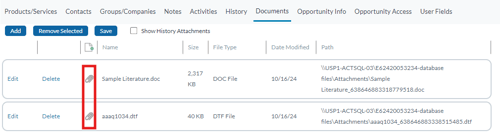
To view a quote listed on the ACT! for Web Documents tab, click on the ![]() icon next to the document name. QuoteWerks will launch, and open that quote.
icon next to the document name. QuoteWerks will launch, and open that quote.
Create ACT! for Web Follow-up Calls
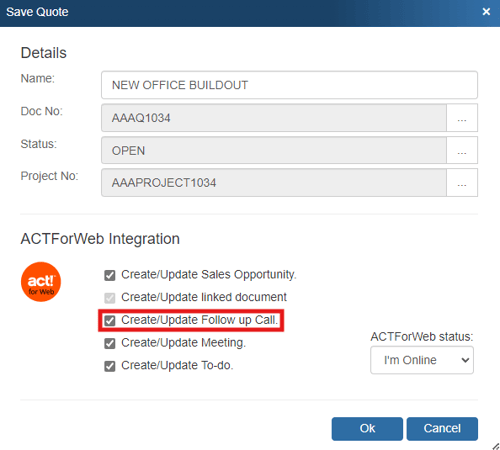
This feature will schedule a follow up call in ACT! for Web. By scheduling follow up calls, you increase your chances of closing the sale. The follow up call will be listed under the Activities tab in ACT! for Web.
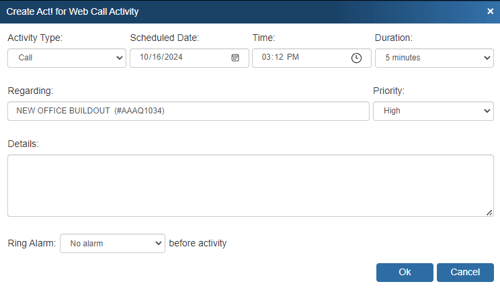 If you already have a callback scheduled for this quote, QuoteWerks will display it so you can modify it.
Create ACT! for Web Meetings
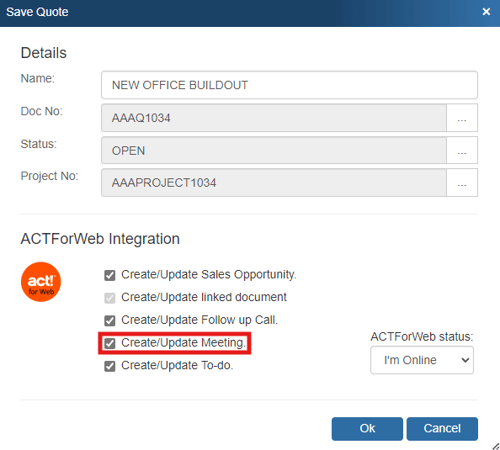
This feature will schedule a meeting related to this quote in ACT! for Web. By scheduling meetings at the time, you create the quote or order, you won’t ever forget to take care of all the details related to your quote or sale. The meeting will be listed under the Activities tab in ACT! for Web.
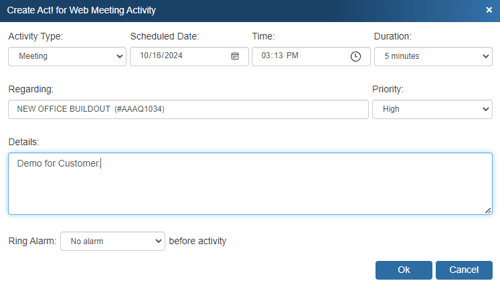
If you already have a meeting scheduled for this quote, QuoteWerks will display it so you can modify it.
Create ACT! for Web To-Dos
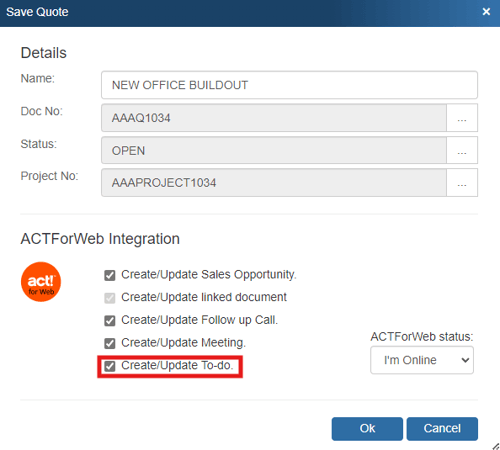
This feature will schedule a to-do activity related to this quote in ACT! for Web. By scheduling to-do items at the time, you create the quote or order, you won’t ever forget to take care of all the details related to your quote or sale. The to-do item will be listed under the Activities tab in ACT! for Web.

If you've already scheduled a to-do activity scheduled for this quote, QuoteWerks will display it so you can modify it.
Create new ACT! for Web Accounts and Contacts
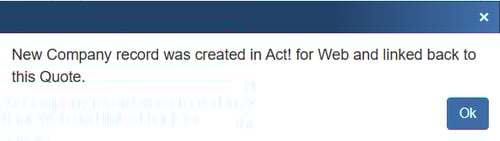
If the customer does not exist in Act! for Web, you can create them from QuoteWerks by filling in the required information on the Sold to/Ship to tab.
When you fill in the required information the gold create button (![]() ) will be available and let you create the new account in Act! for Web. However, if the company does exist and you simply need to add a contact to an existing account in Act! for Web, you will have to add the contact to Act! for Web from Act! for Web.
) will be available and let you create the new account in Act! for Web. However, if the company does exist and you simply need to add a contact to an existing account in Act! for Web, you will have to add the contact to Act! for Web from Act! for Web.
Completing or Updating a Completed Sale in ACT! for Web
When you convert a quote to an order, the Update ACT! Completed Sales Opportunity window will appear so you can review and make changes to the completed sales opportunity before it is created in ACT! for Web. This includes the Reason, Close Date, and details.
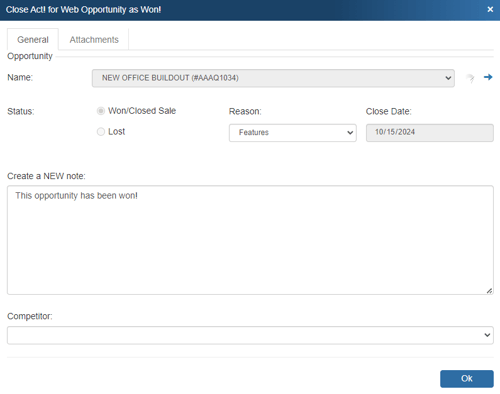
The result will automatically be set to Won/Closed Sale. If you've already previously created a sales opportunity for this quote, QuoteWerks will display it so you can review/modify it.
DataLink Setup
The DataLink feature allows you to pull additional information from fields in your contact manager when retrieving the contact information from your contact manager. This data from your contact manager can be used to complete fields in the QuoteWerks document such as a customer profile, the tax rate, customer terms, custom fields, etc. for the customer. Clicking on the [DataLink] button on the Contact Manager Setup window will display the DataLink setup window.
Contact manager data fields can also be inserted into the print layouts so that the data is copied from the contact manager and then printed on your quote without being stored in the quote itself.
To setup the DataLink, click on Setup-> CRM Integrations menu selection. Click on your CRM/PSA and click on [DataLink] button at the bottom of the page.
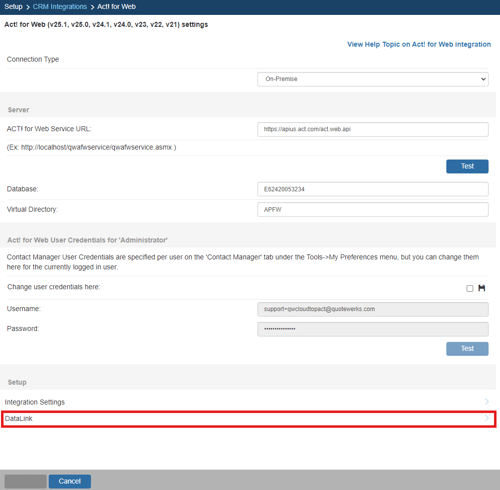
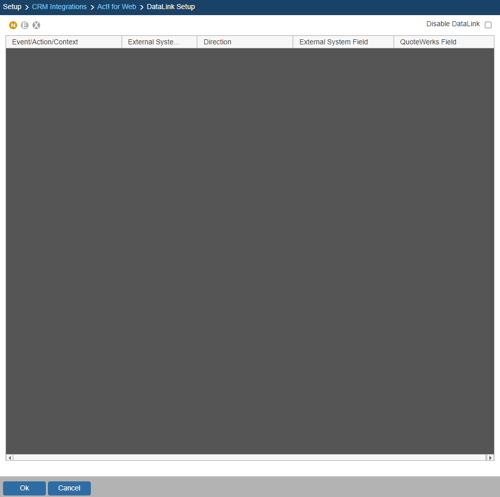
The DataLink Setup page will open. If you have not created a DataLink yet, the field will be blank:
Create, Edit, Delete DataLinks
The three icons on the top left of the window will allow you to create (![]() ), edit (
), edit (![]() ), and delete (
), and delete (![]() ) DataLinks.
) DataLinks.
Creating a new DataLink
In the following example we are going to walk through how to pull the tax rate field from the QuoteWerks contact database and have it populate the tax rate field on the Sale Info tab. You can pull this and many other fields through the DataLink mapping window. You will need to create a new DataLink for each field you would like to populate however.
Step 1: Click on the create (![]() ) button.
) button.
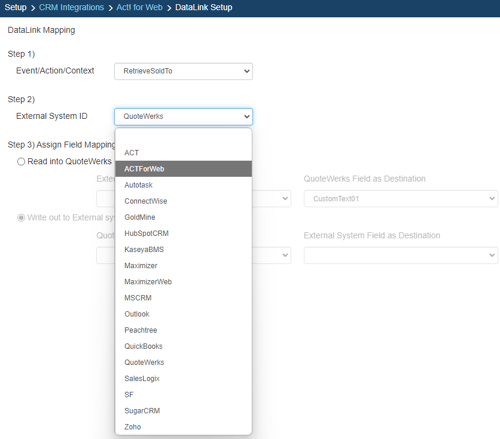
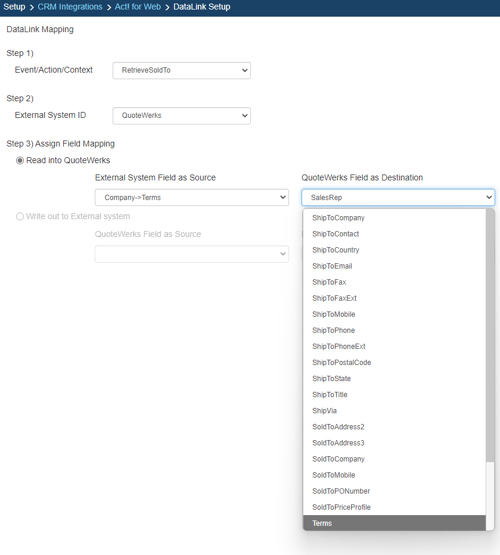
Step 2: On the next window (DataLink Mapping), change the first drop-down menu to RetrieveSoldTo, RetrieveShipTo, or RetrieveBillTo. Your selection here will determine when the field from your CRM/PSA is pulled into QuoteWerks (i.e. the filed data is pulled in when pulling the contact details into the Sold to, Ship to, or Bill to fields).

Step 3: Under the External System ID field, change the drop down to your CRM/PSA, in this case ACT! for Web.
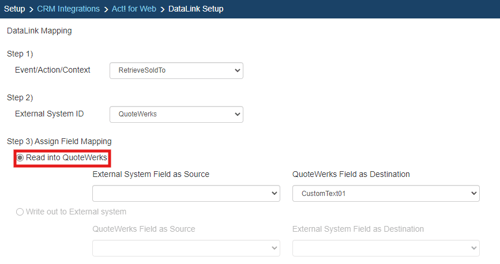
Step 4: On the next field of Assign Field Mapping click on the radial button for Read into QuoteWerks.
Step 5: The drop down for External System Field as Source will list the fields available from your CRM/PSA. Select the field you would like to pull into QuoteWerks.
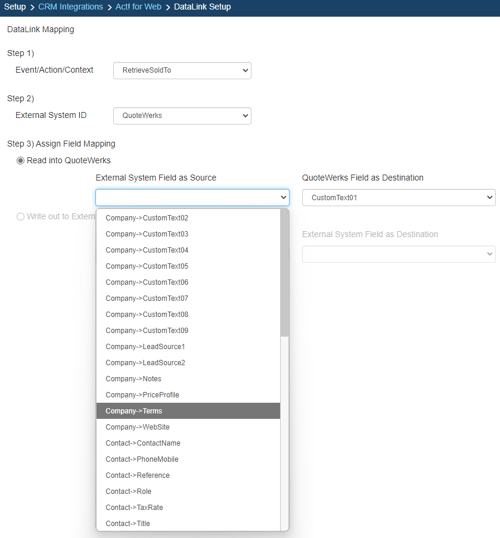
Step 6: Once your External field as source is selected, choose the QuoteWerks field that you would like the data from your CRM/PSA to populate in the QuoteWerks Field as a Destination.
Step 7: Click [Ok] to complete the DataLink Mapping. The new DataLink will appear in your list of configured DataLinks.

Editing an existing DataLink
To edit an existing DataLink, highlight the link and click on the edit (![]() ) button. This will open the DataLink Mapping window and allow you to change any of the fields previously set for that DataLink.
) button. This will open the DataLink Mapping window and allow you to change any of the fields previously set for that DataLink.

Deleting an existing DataLink
To delete an existing DataLink, highlight the link and click on the delete (![]() ) button. This will remove that specific DataLink from your system. Please note, this cannot be undone.
) button. This will remove that specific DataLink from your system. Please note, this cannot be undone.
Disabling a DataLink
Disabling a DataLink will let users disable the DataLink from working without having to remove the link. This is very useful if you need to stop a DataLink from working for a period of time, but do not want to remove it from the DataLink list.
To disable a DataLink, highlight the DataLink and click on the checkbox for Disable DataLink. Uncheck it to re-enable the DataLink.
F2 Lookup Features
A list item in an F2 Lookup can be setup to retrieve information from your contact manager. For ACT! for Web you can retrieve company information. For a list of fields that you can use, go into the DataLink setup where you add a new field mapping and in the Contact Manager Field drop down you will see a list of all the available fields that can be used.
Example:
~ACTForWeb_Macro (tbl_contact->home_phone)
NOTE: See the F2 Lookup section in Customizing QuoteWerks for more details on the F2 Lookup feature.