
This article takes you through using the SugarCRM Integration in QuoteWerks. This will show you how to pull SugarCRM customer records into sales quotes, create opportunities, and more.
This article includes information on the following topics:
- SugarCRM Online/Offline Status
- Pulling SugarCRM Contact Information into QuoteWerks
- Create new SugarCRM Accounts and Contacts
- Creating or Attaching to an Opportunity in SugarCRM
- Creating or Updating a Follow-Up Call in SugarCRM
- Creating or Updating a Linked Document in SugarCRM
- SugarCRM Auto-Links
- F2 Lookup Features
- DataLink Setup
SugarCRM Online/Offline Status
Writing information to SugarCRM requires that you have access to SugarCRM online. If you are running QuoteWerks on a laptop and are not connected to the internet, you will not be able to write information back to SugarCRM. On the Save window there is an “I’m Offline” option that enables you to save the quote and not attempt to integrate with SugarCRM online:

With this option, it is now easy to still save quotes in QuoteWerks even though SugarCRM is not available. Please note, any quotes saved while offline will need to be re-opened, linked to a SugarCRM contact and saved in order to update SugarCRM online.
Pulling SugarCRM Contact Information into QuoteWerks
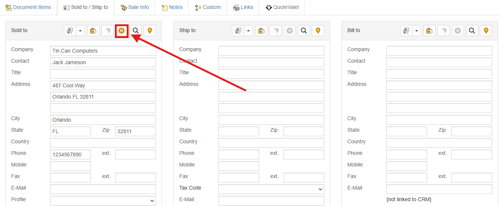
To retrieve account/contact information from SugarCRM into QuoteWerks, first select the Sold to / Ship to tab. Click on the ![]() button next to the Sold to, Ship to or Bill to boxes.
button next to the Sold to, Ship to or Bill to boxes.
The Lookup SugarCRM contact window will appear:

Select the field that you want to use in the search and then enter the corresponding value. When you click on the [Find] button, the results of your search will be displayed. If you choose to search either an Account Name or Account Phone, an additional option to “Also display Account Contacts” will be available.
Once you have found the account or contact you are looking for, select the record and click on the [Sold To] button to use this record for the Sold to information. You can also select a record and click on the [Ship To] button to use this record for the Ship to information or you can click on the [Bill To] button to use this record for the Bill to information. When you are finished selecting records, click on the [Close] button. You will be returned to the Sold to/ Ship to tab and the selected records will be pre-filled in the Sold to/Ship to/Bill to fields.
NOTE: When pulling a contact, if the contact address is empty, the company address will be used.
Create new SugarCRM Accounts and Contacts
If the customer does not exist in SugarCRM, you can create them from QuoteWerks by filling in the required information on the Sold to/Ship to tab. When you fill in the required information the gold new button (![]() ) will be available and let you create the new account in SugarCRM. However, if the company does exist and you simply need to add a contact to an existing account in SugarCRM, you will have to add the contact to SugarCRM from SugarCRM.
) will be available and let you create the new account in SugarCRM. However, if the company does exist and you simply need to add a contact to an existing account in SugarCRM, you will have to add the contact to SugarCRM from SugarCRM.
Creating or Attaching to an Opportunity in SugarCRM
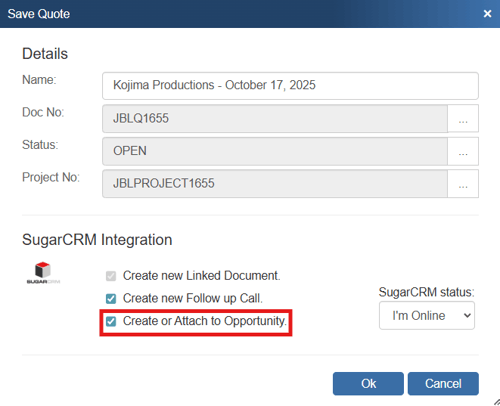
When saving a document, the “Create or Attach to/Update existing Opportunity” checkbox will appear on the Save window.
NOTE: This checkbox will NOT appear if you are saving a quote template.
Once you have pressed the [OK] button from the File -> Save window, the “Create a new/Update existing SugarCRM Opportunity” window will appear, allowing you to adjust information about the opportunity such as the Type, Lead Source, Campaign, Expected Close Date, Next Step, Sales Stage, Probability and Description.
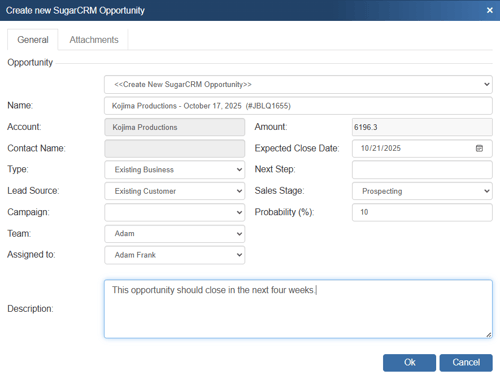
The Opportunity Name drop down will contain a list of all existing SugarCRM opportunities associated with the SugarCRM contact record you have linked to. If you have not already created a new opportunity for this quote, then here you can select an existing opportunity to update with the current quote’s information.
Once you click [Ok], this option will create or update a SugarCRM opportunity or attach to an existing opportunity in SugarCRM under the Opportunities heading.
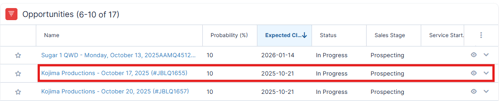
By creating opportunities in SugarCRM, you allow SugarCRM to generate reports reminding you to close sales. This feature helps you estimate your cash flow. If you already have an opportunity for this quote, it will automatically update the existing one to reflect changes you have made to the quote.
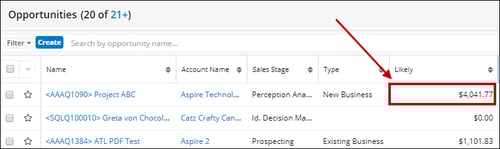
NOTE: When QuoteWerks updates a SugarCRM opportunity, it updates the Opportunity amount (which displays in the Likely column) but not the Best or Worst amounts. This is standard behavior in the SugarCRM user interface.
QuoteWerks claims ownership of SugarCRM opportunities that were created or updated from within QuoteWerks. It is not recommended that you manually make changes to the opportunity from within SugarCRM as these changes may be overwritten by QuoteWerks when QuoteWerks is updating the SugarCRM opportunity.
NOTE: Advanced users can use the Settings Manager to create or set the following defaults per each user:
UserSettings\UserConfig\ForecastCloseDate={+30)
UserSettings\UserConfig\ForecastProbability=90
UserSettings\UserConfig\CallBackDate={+7)
UserSettings\UserConfig\CallBackTime={+30)
The codes for ForecastCloseDate and CallBackDate will schedule the date for today’s date plus 30 days or plus 7 days, the code for CallBackTime schedules the call time for the current time plus 30 minutes.
Opportunity Revenue Line Items (SugarCRM Enterprise Only)
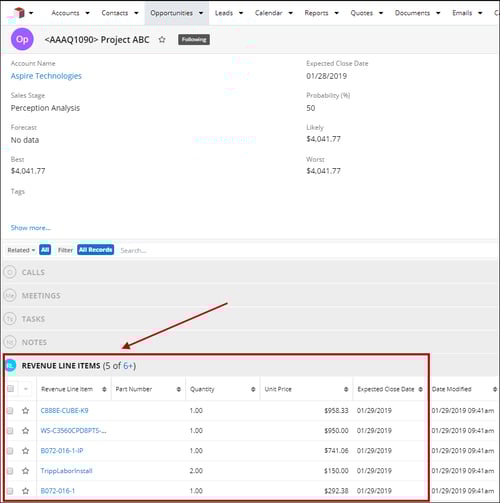
If you’re using SugarCRM Enterprise, then QuoteWerks will create an Opportunity Revenue Line Item, which then, in SugarCRM, will update the Opportunity’s total amount. The revenue line-item name will be rolled-up summary line if using the summary line option from the setup. If you choose to write the individual revenue line items into the Opportunity, each line item will be populated in the Revenue Line Items section of the opportunity.
Creating or Updating a Follow-Up Call in SugarCRM
When you're saving a document, the “Create new/Update existing Follow up Call” checkbox will appear on the Save window.
NOTE: This checkbox will NOT appear if you are saving a quote template.
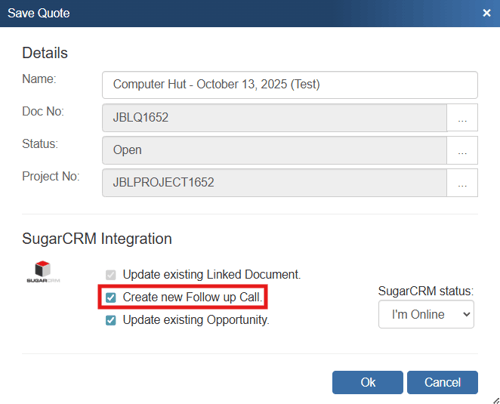
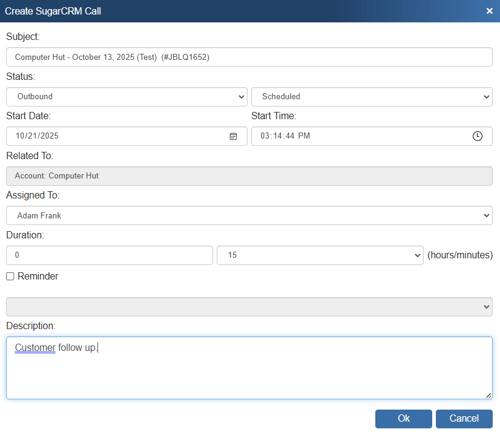
Once you have pressed the [OK] button from the File -> Save window, the “Create a new/Update existing SugarCRM Call” window will appear, allowing you to adjust information about the call such as the Subject, Start Date & Time, Duration, Status, Reminder and Description.
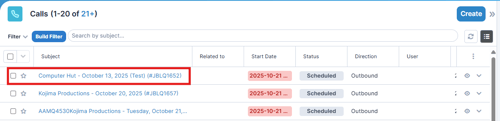
This option will create a SugarCRM Follow up Call or update an existing Follow up Call in SugarCRM. If an account was not selected when pulling in the contact, the call will be saved to the contact instead.
Creating or Updating a Linked Document in SugarCRM
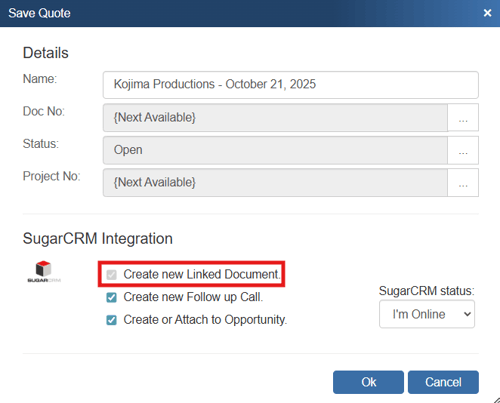
When you're saving a document, the “Create new/Update existing Linked Document” checkbox will appear on the Save window.
NOTE: This checkbox will NOT appear if you are saving a quote template and will be checked and disabled if the Look for synchronized data in dtf files option is set.
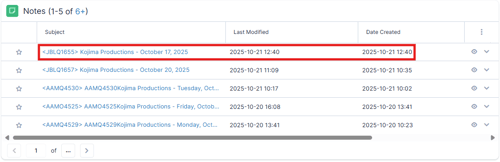
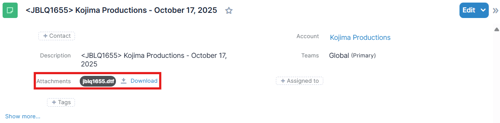
If you check this option, a note attachment record that refers to the document you are saving will be created or updated under the contact's Notes section in SugarCRM.
When using SugarCRM, you can choose to open this attachment by clicking on the “Subject” link under the Notes heading and then clicking the “Attachment” link in the window that displays. This will launch QuoteWerks and open the document.
SugarCRM Auto-Links
The Auto-Links window creates dynamically generated links from SugarCRM and links to specific details from the QuoteWerks quote. These links are automatically created.
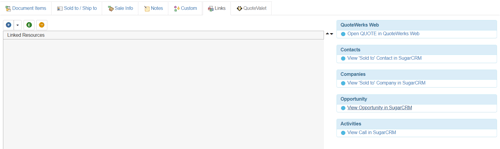
This functionality provides users with an easy way to view the contact(s) from the quote, the opportunity that was created based on this quote and the activity (such as follow up calls). Clicking on one of these links will open SugarCRM and display the link information. For example, clicking on the "View Opportunity in SugarCRM" link would open this specific opportunity in SugarCRM for you.
F2 Lookup Features
A list item in an F2 Lookup can be setup to retrieve information from your contact manager. For SugarCRM you can retrieve account or contact information. For a list of fields that you can use, go into the DataLink setup where you add a new field mapping and in the Contact Manager Field drop down you will see a list of all the available fields that can be used.
Example:
~SugarCRM_Macro (contact->phone_home)
NOTE: See the F2 Lookup section in Customizing QuoteWerks for more details on the F2 Lookup feature.
DataLink Setup
The DataLink feature allows you to pull additional information from fields in SugarCRM when retrieving the contact information. This data from SugarCRM can be used to complete fields in the QuoteWerks document such as a customer profile, the tax rate, customer terms, custom fields, etc. for the customer. Clicking on the [DataLink] button on the Contact Manager Setup window will display the DataLink setup window.
Contact manager data fields can also be inserted into the print layouts so that the data is copied from the contact manager and then printed on your quote without being stored in the quote itself.
To setup the DataLink, click on Contacts-> Setup Contact Manager menu selection. Click on SugarCRM then click on the [DataLink].
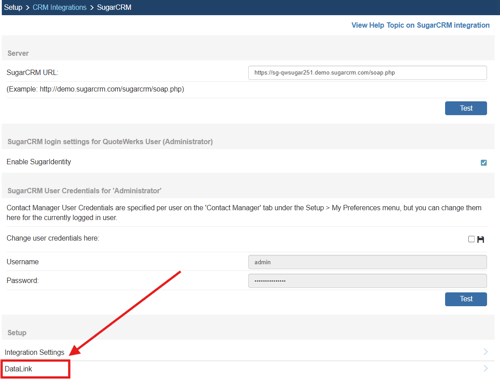
The DataLink Setup window will open. If you have not created a DataLink yet, the field will be blank:
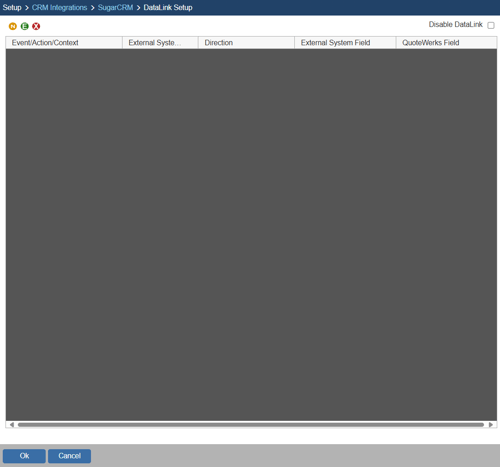
The three icons on the top left of the window will allow you to create (![]() ), edit (
), edit (![]() ), and delete (
), and delete (![]() ) DataLinks.
) DataLinks.
Creating a new DataLink
In the following example we are going to walk through how to pull the Campaign ID field from SugarCRM and have it populate a Custom field in QuoteWerks. You can pull this and many other fields through the DataLink mapping window. You will need to create a new DataLink for each field you would like to populate however.
Pulling Additional SugarCRM Fields into QuoteWerks
Step 1: Click on the create () button.
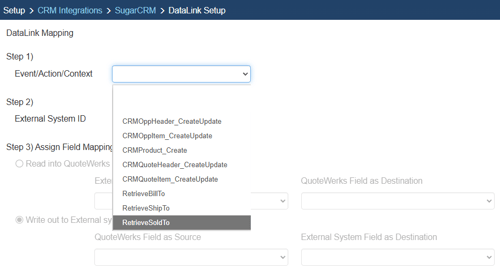
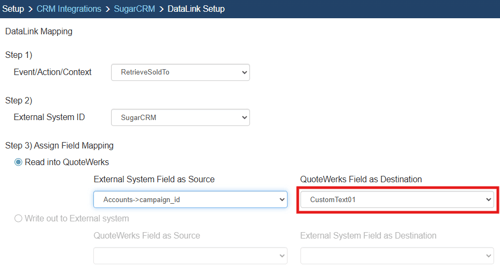
Step 2: On the next window (DataLink Mapping), change the first drop-down menu to RetrieveSoldTo, RetrieveShipTo, or RetrieveBillTo. Your selection here will determine when the field from your CRM/PSA is pulled into QuoteWerks (i.e. the filed data is pulled in when pulling the contact details into the Sold to, Ship to, or Bill to fields).
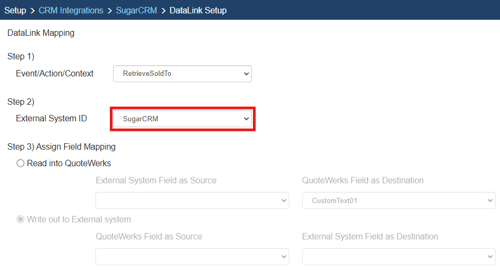
Step 3: Under the External System ID field, change the drop down to SugarCRM.
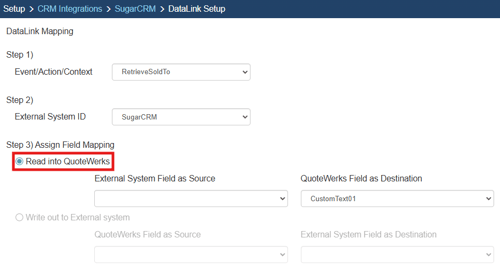
Step 4: On the next field of Assign Field Mapping click on the radial button for Read into QuoteWerks.
Step 5: The drop down for External System Field as Source will list the fields available from SugarCRM. Select the field you would like to pull into QuoteWerks.
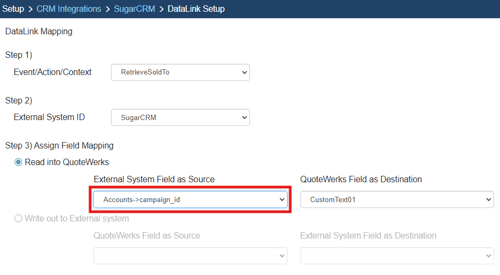
Step 6: Once your External field as source is selected, choose the QuoteWerks field that you would like the data from SugarCRM to populate in the QuoteWerks Field as a Destination.
Step 7: Click [Ok] to complete the DataLink Mapping.

Pushing Additional QuoteWerks Fields into SugarCRM
Creating a new DataLink
In the following example we are going to walk through how to push data from CustomText01 from QuoteWerks and have it populate a Field in SugarCRM. You can push other fields through the DataLink mapping window. You will need to create a new DataLink for each field you would like to populate however.
Step 1: Click on the create () button.
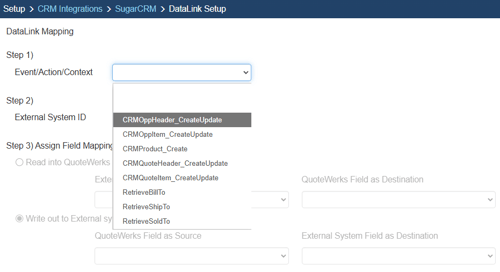
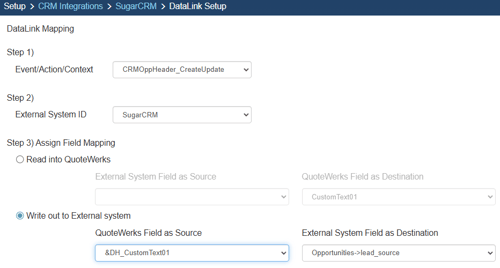
Step 2: On the next window (DataLink Mapping), change the first drop-down menu to CRMOppHeader_CreateUpdate to choose to push a DocumentHeader field from QuoteWerks to SugarCRM. To push specific line-item information, select CRMOppItem_CreateUpdate option. Your selection here will determine the table that QuoteWerks will use to push data into SugarCRM.
Step 3: Under the External System ID field, change the drop down to SugarCRM.
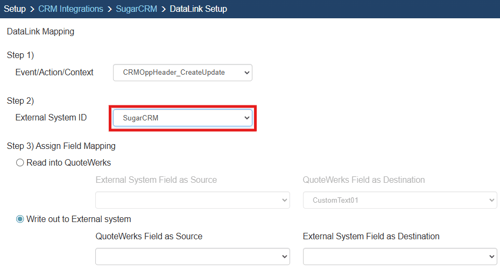
Step 4: On the next field of Assign Field Mapping click on the radial button for Write out to External System.
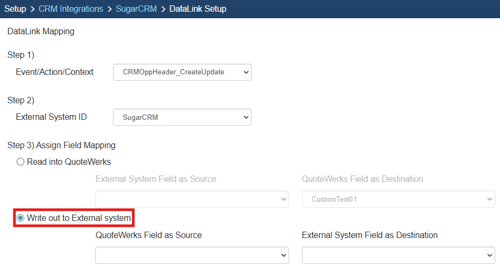
Step 5: The drop down for QuoteWerks Field as Source will list the fields available from QuoteWerks. Select the field you would like to push into SugarCRM.

Step 6: Once your External field as source is selected, choose the SugarCRM destination field where you would like the data to be populated in the External System Field as a Destination.
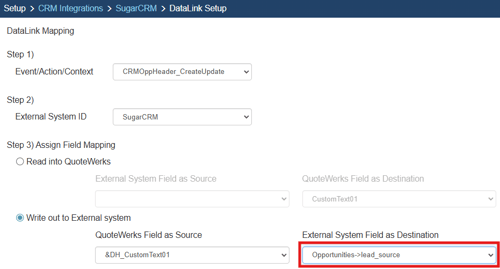
Step 7: Click [Ok] to complete the DataLink Mapping.

Editing an existing DataLink
To edit an existing DataLink, highlight the link and click on the edit (![]() ) button. This will open the DataLink Mapping window and allow you to change any of the fields previously set for that DataLink.
) button. This will open the DataLink Mapping window and allow you to change any of the fields previously set for that DataLink.
Deleting an existing DataLink
To delete an existing DataLink, highlight the link and click on the delete (![]() ) button. This will remove that specific DataLink from your system. Please note, this cannot be undone.
) button. This will remove that specific DataLink from your system. Please note, this cannot be undone.
Disabling a DataLink
Disabling a DataLink will let users disable the DataLink from working without having to remove the link. This is very useful if you need to stop a DataLink from working for a period of time, but do not want to remove it from the DataLink list.
To disable a DataLink, highlight the DataLink and click on the checkbox for Disable DataLink. Uncheck it to re-enable the DataLink.