The Outlook (New/Cloud) Contact Manager Integration allows you to search and select contacts directly from your cloud-based Microsoft Outlook account. It supports New Outlook, Outlook on the web, and Classic Outlook when contacts are stored online rather than locally on your computer.
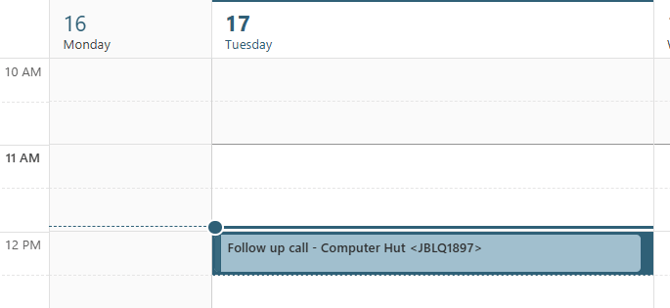
For convenient follow-up management, you can schedule calls on your Microsoft 365 calendar directly from QuoteWerks, using your preferred default duration, reminder, and category settings.
IMPORTANT: Before you can use the integration you must first follow the setup instructions outlined in the How Do I Setup the Outlook (New/Cloud) Integration? help article.
Adding a Contact to a Quote
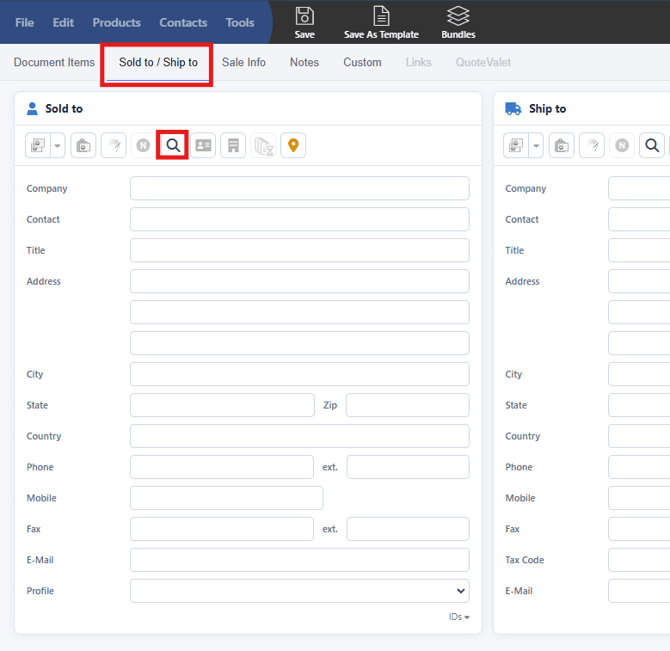
1. Navigate to the Sold to/Ship to tab and click on the magnifying glass to select a contact to add to your quote.
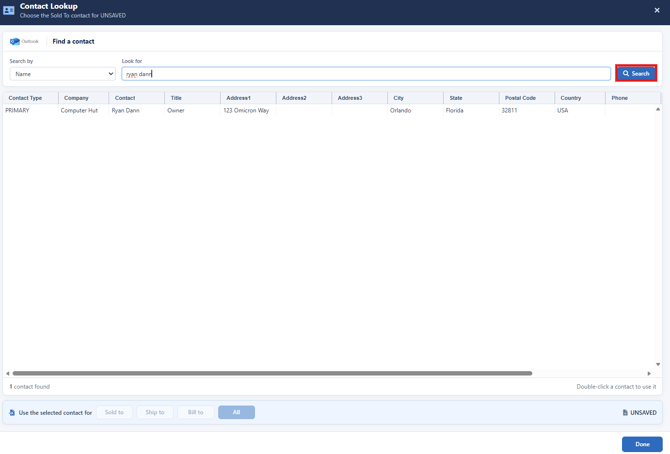
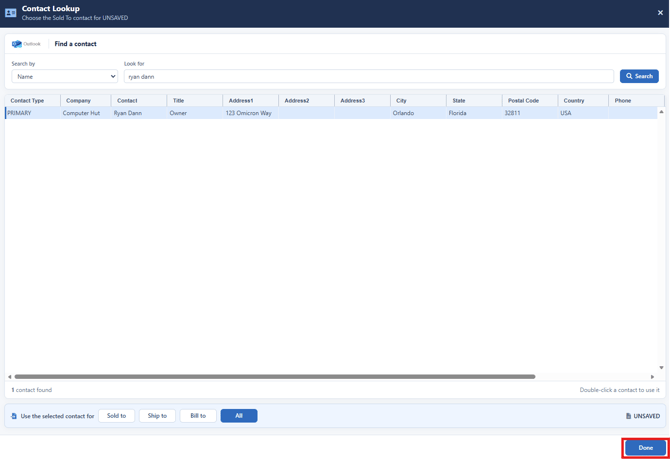
2. This opens the Contact Lookup window where you can search your Outlook contacts by Name, Phone, Company Name, Company Phone, Contact First or Last Name, or Contact Email. Choose your Search by criteria, enter your search terms in the Look for field, and click Search.
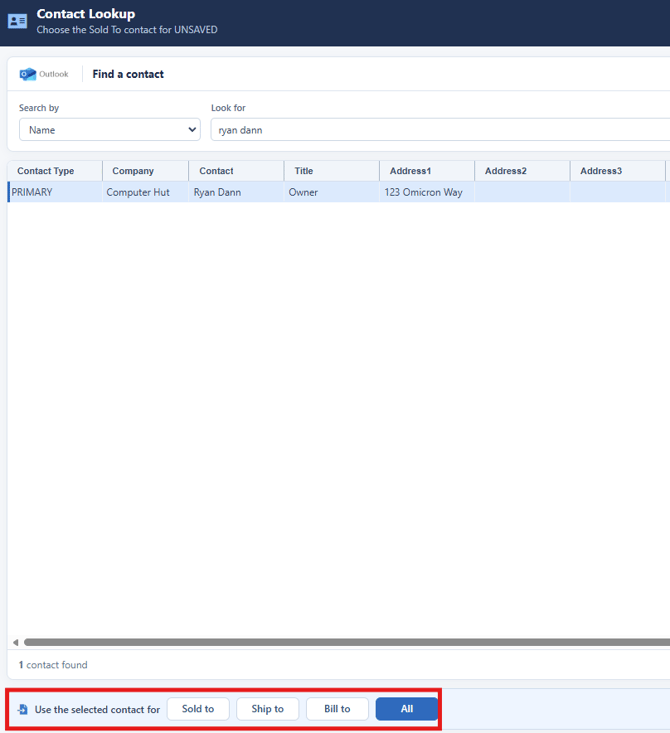
3. Select the desired contact and to add them to the quote click on Sold to, Ship to, Bill to, or all next to "Use the selected contact for."
4. When you are done adding your contacts click on the Done button and you are returned to the Sold to/Ship to tab where your contact has been added to the selected fields.
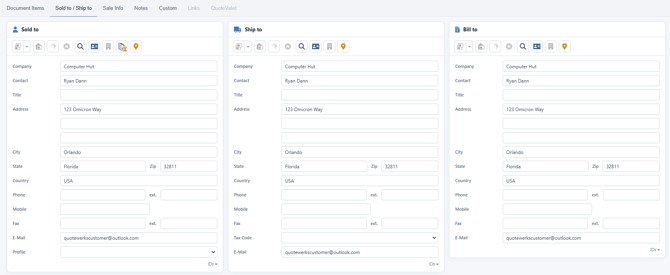
5. You can now begin building your quote.
Create/Update Follow Up Call
1. To create/update a follow up call you first want to link and Outlook contact to the quote by following the instructions above.
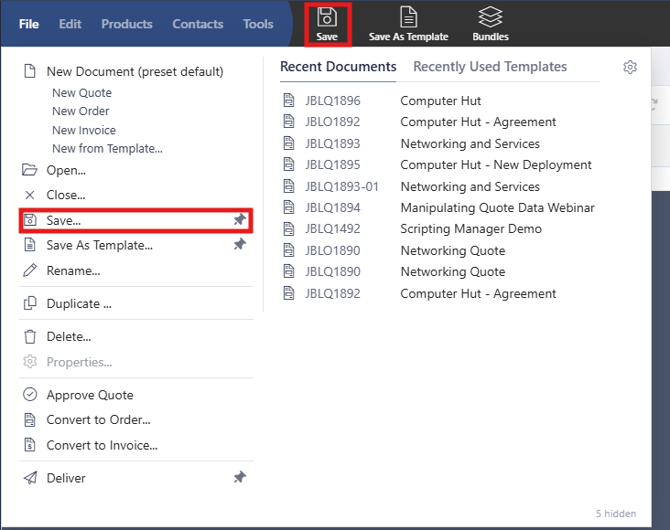
2. Save the quote by clicking save from the File dropdown menu for Save from the Boss toolbar.
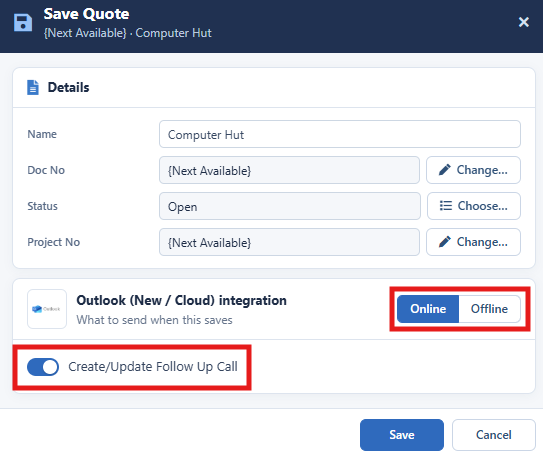
3. This opens the Save window where you are prompted to Create/Update Follow Up Call. Toggle the button on if you would like to do so. Make sure that you are set to Online and click Save.
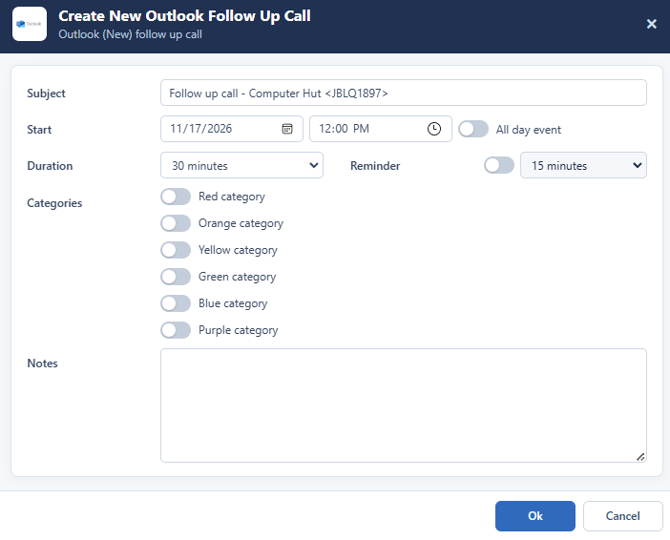
4. This opens the Create New Outlook Follow Up Call window where you can set the Subject, Start date and time, Duration, set a reminder, categories, and input notes about the call. Once you have made your selections click Ok.
5. If you navigate to your calendar in outlook you will see the new entry has been created with the options you specified.